Lesson 5: Scripting With JavaScript

Lesson 5: Scripting With JavaScript

Introduction

In this lesson, we'll focus on scripting languages in general and JavaScript in particular. The purpose of JavaScript is to make your app more dynamic by giving it the ability to do things with data and to interact with the user.

Now, I could teach an entire 12-lesson course just on JavaScript, so I'm not going to tell you that one lesson will make you an expert. I just want you to know what JavaScript is, why it matters, and how you can use bits of it in the apps you invent.

In Chapter 2, we'll discuss about what JavaScript is and how it works. You'll be able to impress your friends as you throw around terms like client-side scripting language. We'll also explore the syntax of JavaScript, which means the arrangement of its bits and pieces. In human languages, sentences have structure, and words need to be arranged in a certain order. In the same way, JavaScript won't work if you put its components in the wrong order or misspell commands.

How does JavaScript work with an HTML document? We'll cover this question in Chapter 3, and I'll introduce you to a sort of map called the HTML DOM.

In Chapter 4, we'll go back to our WatzThis code. I bet some of it will make more sense to you with your newfound knowledge.

This chapter contains lots of definitions and technical explanations. If you start to get confused, don't worry. As you continue in this course and start to build apps of your own, the different parts of the puzzle will begin to come together.

You can always print out these lessons and the course index, so you can refer to them later. And I'm available in the Discussion Area to answer questions and respond to comments. Your classmates and I would love to hear from you.

Our friends at WatzThis won't get far without JavaScript as they develop apps, and neither will you! It's the third leg of the three-legged stool (along with HTML and CSS) that makes HTML5 mobile apps possible.

Let's move on to Chapter 2. It's a long and somewhat complex chapter, so feel free to take a break if you need to while you're working your way through it.

Learning the Rules of JavaScript

The purpose of JavaScript is to make your app more dynamic by giving it the ability to do things with data and to interact with the user.

JavaScript is a scripting language. That's a type of programming language that controls other applications (such as a Web browser or word processor, for example). Other examples of scripting languages include VBScript, Perl, Python, and PHP. People generally consider scripting languages more "lightweight," meaning easier to learn and use than a traditional full-fledged programming language such as C or Java. Programmers use scripting languages for all sorts of tasks on the Web and on mobile devices.

The Web is an example of client-server computing. This type of computing divides different parts of an application between the user's computer (the client) and a central computer that services many users (the server).

Because JavaScript code runs in your Web browser rather than on a server, we call it a client-side scripting language. Other popular languages that people use on the Web—such as PHP, Java, Perl, Ruby, Python, and C—run their code on the server and then send the results to the browser. When programming code runs on a server, people call it (surprise!) server-side code.

Traditionally, most of the work in client-server computing has taken place on the server side. Today, however, a typical user's computer actually may have more available computing power than a typical Web server. As a result, it's become advantageous for more of the heavy data processing of the Web to happen on the client side—in the user's Web browser, in other words.

On mobile devices, bandwidth is often at a much higher premium than processor power. In other words, it's more important to reduce the number of times that the app needs to talk to the server than it is to reduce the amount of work the mobile device does. For this reason, mobile Web app developers rely heavily on JavaScript to handle many tasks that traditionally were accomplished on the server and then transmitted to the browser.

There's No "I" in Syntax

Every language has rules—whether it's a spoken language such as English or Chinese or a programming language such as JavaScript. Computers are usually not anywhere near as smart or as flexible as people are, so the rules for talking to computers are generally stricter than the rules for talking to people. But the principles are the same.

The rules of a programming language are its syntax.

Rules for JavaScript Syntax

  • Capitalization matters. Although it's perfectly okay to spell a tag <DIV> or <div> in HTML5, JavaScript won't recognize "Window" as being the same as "window."
  • Use semicolons (;) to separate statements. Either a new line or a semicolon must separate each statement in a JavaScript program. Line breaks are easy to delete, so to be safe, always end a JavaScript statement with a semicolon.
  • Put text in quotation marks. Use single or double quotation marks around text that you want JavaScript to treat as text, rather than as numbers or code. Another name for literal text content in programming language is a string.

Here's a very simple JavaScript program. As is the tradition with any sort of introduction to a programming language, this program's only task is to output the words "Hello, World!" Don't worry . . . things will get more interesting, and useful, soon.

<script>
  var message;
  message = "Hello, World!";
  document.write(message);
</script>

To test this program, follow these steps:

  1. Create a new HTML5 document in Komodo Edit by selecting New > File from Template from the File Menu. Komodo Edit will create a new file with a basic HTML5 template.
  2. Paste the code shown above (from <script> to </script>) into the document, anywhere between <body> and </body>.
  3. Save the file, and click the Preview in Browser button.

Here's what you should see:
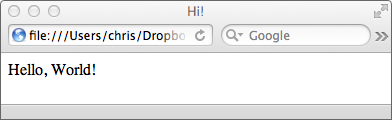
Browser preview showing text Hello, World! Hello, World!

If this isn't what you see, check your program carefully. The slightest mistake, such as a missing quotation mark or parenthesis, will cause the program to malfunction.

Once you've made it through testing the Hello, World! program, let's talk about how it works.

The first thing to notice is that the JavaScript code is inside an HTML <script> element. The <script> element tells the Web browser to treat its contents as a script rather than as HTML. If you attempt to put JavaScript into an HTML page without a <script> block, it won't work. The browser will just print out the JavaScript code to the browser window rather than interpreting and running it.

One exception to the rule that JavaScript must be inside a <script> element is the onclick attribute, which lets you run JavaScript when a user clicks on an HTML element such as a button or link. You'll see an example of onclick in the next chapter.

Variables

If you recall your high school algebra, you know that a variable is a symbol that represents a value we don't know. For example, in this algebraic statement, x and y are variables:

x = 2y

In JavaScript (and in most programming languages), the concept of variables is the same . . . except that variables in programming languages can represent more than just numbers.

A variable is a symbol that represents a value. The value may be a number or a string.

To create a variable in JavaScript, you declare it using the "var" keyword, as in the first line of our Hello, World! program.

var message;

This statement creates a new variable called "message." As long as you follow certain rules in your naming of variables, they can be as long or as short as you like.

Rules for Naming JavaScript Variables

  • Variable names may not start with a number.
  • They can't contain spaces.
  • They can't contain punctuation.
  • You can't use JavaScript keywords (such as "var") as variable names.
  • Variable names are case sensitive. To JavaScript "message," "Message," and "MESSAGE" are all different variable names.

Once you've created a variable, you can fill it up (like an envelope) with data, which is precisely what the next line of our program does. Read on to find out how.

Operators and Output

Operators in programming are similar to operators in mathematics, such as plus (+), minus (-), and so on. There are some differences, however. The most important one has to do with the "=" operator. If you said "equals" in your head when you saw that, pay attention. This isn't the equals operator; it's the assignment operator.

Here's the assignment operator in the Hello World program:

message = "Hello, World!";

It's called the assignment operator because it sets the value of the variable on the left to whatever is on the right. If it were called the equals operator, that would imply that it's comparing the two things, and there's a separate operator called the "is equal to" operator that handles that task. You'll learn about comparison operators later on.

The distinction between "assignment" and "comparison" is important to understand when you're learning programming. Assignment actively puts something into the variable "envelope" (to use my earlier analogy). Comparison checks to see if the thing that's currently in the envelope is the same as something else.

Finally, we're at the point where the program is ready to do something that you can see! Here's the last line of our "Hello, World!" program:

document.write(message);

As you may have guessed, this statement takes the value of the variable that we've named message and writes it into the HTML document. When you read it from right to left, it's almost like English. Often, you'll find that this is the best way to read a line of programming code.

Control Structures and Branching

It's time to learn how JavaScript programs do more complex tasks, such as choosing between multiple paths or repeating code multiple times. To have programs that can serve more than one function, you need to be able to define different paths depending on the input data. In the same way that hoses and plumbing control the flow of water, the next few JavaScript commands you'll learn will help you to control the flow of data.

Commands that control the flow of data in an application are control structures. To see a control structure in action, let's make our app do something that wouldn't be easier to do just by using a simple line of HTML markup: We'll ask it to write out "Hello, World!" 5,000 times.

<script>
  var message;
  message = "Hello, World!";
  for (i=1; i<=5000; i++){
    document.write(message);
  }
</script>

The statement we've added here is a loop. Loops are control structures whose job it is to repeat one or more commands multiple times. This particular type is a for loop. It has three parts:

  1. Initialization (i=1) is where you create a variable (i) and assign it an initial value (1).
  2. The condition (i<=5000) tests the variable to find out if it meets specified parameters. If it does, the for loop will continue; if it doesn't, it won't. In this case, we're checking to see if the value of i is less than or equal to 5,000.
  3. Modification is where the for loop does something to the variable after every time it's run. In this case, the modification (i++) uses the increment operator (++) to add 1 to the value of the variable with every loop.
<script>
  var message;
  message = "Hello, World!";
  for (i=1; i<=5000; i++){
    document.write(message);
  }
</script>
(Initialization; Condition; Modification)

When you run this code, the output looks like this:
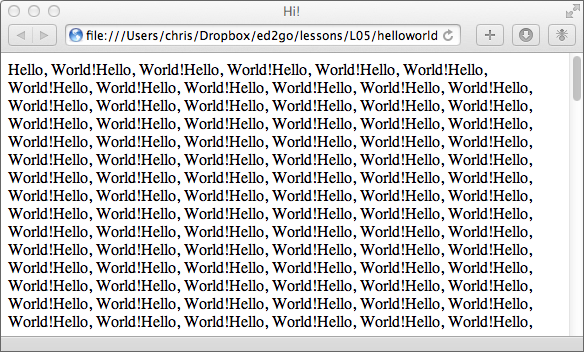
"Hello, World!" repeated 5,000 times in a browser 5,000 times

The final fundamental type of command in JavaScript that we'll cover is branching. It's how programmers say things like, "If this is true, do this. If it's not, do that."

One way to do branching in JavaScript is with the If/then/else statement. Here's an example:

if (language === "English") {
  document.write ("How are you?");
  } else {
  document.write ("Hola!");
  }

You may have noticed the === symbol. This is the identity operator. It means "is exactly equal to." It is slightly different from the "is equal to" operator (==) in that it compares the variable type (number, date, and so on) as well as its value.

I've included a lot of terms and definitions in this chapter. So before we move on to Chapter 3, I'd like you to play this game. Your score won't count as part of your grade, but playing will help you remember what you've learned.

[#TOGGLE#]
[#TOGGLE#]

Read the clue in the first column, and guess the term. Then read the second column for the answer.

Clue Answer
=== (is exactly equal to) Identity operator
Symbol that represents a value Variable
+ or -, among others Operator
What you see when a program runs Output
An if or then statement Branching
[#TOGGLE#]

The HTML DOM

A large part of modern HTML5 Web apps involves using JavaScript to manipulate HTML elements. To be able to do that, you need to understand the system that JavaScript uses to reach out and grab HTML. This system is the HTML Document Object Model, or HTML DOM.

The HTML DOM is a way of representing an HTML document to JavaScript. You can think of the DOM as a map. It tells JavaScript how everything in an HTML page relates to everything else.

For every element, attribute, comment, and bit of text in the HTML document, the Web browser creates a representation called a node in the DOM.

The nodes in the DOM are organized into a tree view (think of a family tree, not an oak tree). At the top of the tree is the document node. Growing out from the document node are all the other elements in the document, starting with the root node, which for HTML documents is always the html node.

HTML DOM tree

Objects

The O in DOM stands for object. Like physical objects (clocks or hats, for instance), objects in the DOM have things that can be done with them and things that they are. In other words, they have behaviors and properties.

Behaviors you can do with a hat include wearing it, taking it off, and pulling it down.

Properties of a hat might include its color, what it's made out of, and its size.

If this hat were part of a JavaScript program, we might use the following code to access its different properties and behaviors:

hat.style.color="blue";
hat.style.size="large";
hat.style.material = "wool";

hat.wear();
hat.pullDown();
hat.takeOff();

In JavaScript (and other programming languages), we refer to behaviors of an object as methods.

Notice the syntax for accessing the properties and methods of the hat in the previous examples. Using a period (also known as a dot) to separate the object name and its properties and methods is dot notation.

The most basic object in the HTML DOM is the document object. This represents the whole HTML document, and it contains every other object. It's possible to manipulate every element in an HTML document and to change various properties (such as the title, background color, and URL) of the document through the document object.

The document object has several useful methods for locating elements inside a document:

  • getElementById()
  • getElementsByName()
  • getElementsByTagName()

For example, here's a simple HTML5 document that prints out a sentence of text. A JavaScript command inside the onclick attribute of the button changes the sentence when you click it.

<html>
  <head>
    <title>What's the text?</title>
  </head>
  <body>
  <div id="myWords">HTML wrote me</div>

  <button onclick="document.getElementById('myWords').innerHTML='JavaScript wrote me';">Click Here</button>
  </body>
</html>

If you open this document in a Web browser, you'll see the words "HTML wrote me" quickly appear, and then the words "JavaScript wrote me" replace them when you click the button.

Let's move on to Chapter 4, where we'll see how the WatzThis code reflects what we've covered in this lesson.

The WatzThis Code

It's time to bring everything you've learned together and look again at the WatzThis.com app that you built in Lesson 2. Here's the code:

<!DOCTYPE html>  
<html> 
<head>    
<meta charset="utf-8">
<meta name="HandheldFriendly" content="True">   
<meta name="MobileOptimized" content="320"/>   
<meta name="viewport" content="width=device-width, initial-scale=1.0">        
<title>WatzThis?</title>  
<script> 
var light = new Array(); 
var t; 
var color=0; 
var flipping=0; 
var speed;  
light[0] = 'black'; 
light[1] = 'white'; 
light[2] = "red"; 
light[3] = "blue"; 
light[4] = "green"; 
light[5] = "orange";  
function flip(whichway){   
   document.body.style.backgroundColor = light[whichway];   
   stopFlip(); 
}      
function autoFlip() { 
   document.body.style.backgroundColor = light[color];
   if (color < light.length-1) {         
     color++;     
   } else {         
     color=0;     
   }     
t = setTimeout("autoFlip()",speed); 
} 
function doAutoFlip(changespeed){     
 if (!flipping){         
   flipping=1;   
   speed=changespeed;      
   autoFlip();     
 }    
} 
function stopFlip() {     
 clearTimeout(t);     
 flipping=0; 
} 
</script>    
</head>  
<body>     
<div id="container"> 

<div id="flashlight">
<input type="button" id="OFF" class="bigButton" value="OFF" onclick="flip(0);"> 
<input type="button" id="ON" class="bigButton" value="ON" onclick="flip(1);"> 
<input type="button" id="RED" class="bigButton" value="RED" onclick="flip(2);">     
</div> 
<div id="danceparty"> 
<input type="button" id="AUTO" class="bigButton" value="AUTO" onclick="doAutoFlip(500);"> 
<input type="button" id="STOP" class="bigButton" value="STOP" onclick="stopFlip();"> 
</div>     
</div>
</body> 
</html> 

This code should look a bit more intelligible to you than it did back in Lesson 2. There are still a few concepts in here that you haven't learned, however. Let's look at those now.

Arrays

The first line of code inside the <script> block is this:

var light = new Array();

This line creates a special type of variable called an array, which can hold multiple values. An array is like a pillbox with multiple sections for different pills.

A pillbox with multiple sections

Each section of the pillbox holds a different pill, but it's just one pillbox. If you were to tell someone else which pill to get from this box, you would say something like, "Get the pill from the Wednesday section of the box."

The WatzThis app uses an array called light to store the different colors of lights it will cycle through in automatic mode. Once you've created an array, you can fill it with values, as our app does a few lines later in the program:

light[0] = "black"; 
light[1] = "white"; 
light[2] = "red"; 
light[3] = "blue"; 
light[4] = "green"; 
light[5] = "orange";  

Here we populate the array with six different values (remember that computers start counting with 0). These values are array elements. Once you create an element, you can get its value in an array by referring to the array name with the number of the element in square brackets—the same way you put the value there in the first place.

Being able to access array elements using a numerical index gives you the ability to programmatically select, or loop through, the elements by changing the number in the brackets, which is exactly what the WatzThis app does.

Functions

Functions are a way to create reusable pieces of programming code. Creating reusable code saves you effort, makes your apps more maintainable, and reduces download time.

To create a JavaScript function, you use the function keyword. Like an array, a function doesn't do anything by itself. It's not until you specifically use the array that its code runs.

The format for creating functions is as follows:

function functionName (input values) {

}

Inside the curly brackets, you can put any code that you want to run when the function is executed. This code can use any input values, which are "passed" into the function inside the parentheses after the function name.

The first function WatzThis.com created is the flip function.

function flip(whichway){   
    document.bgColor = light[whichway];   
    stopFlip(); 
}      

This function changes the background color. To use this function, you simply use the function name ("flip" in this case) along with a value that corresponds to an array element of the light array.

In WatzThis, we use the function (programmers say "call the function") using the onclick event tied to each of the buttons.

<input type="button" id="RED" class="bigButton" value="RED" onclick="flip(2);">

Here's what happens when you click the RED button:

  1. The code calls the flip function and gives the value "2" as input.
  2. Inside the function, the script creates a variable named "whichway" with the value of 2.
  3. The backgroundColor style property (remember your CSS?) of the document body is set to the value of the light array element with the index of 2, which happens to be "red." In other words, red becomes the background color.
  4. The flip function calls another function, stopFlip(). This function stops the automatic flipping if it happens to be running when someone presses one of the non-automatic flipping buttons.

By using functions and arrays, WatzThis makes it possible for you to create new buttons that can change the background to any color you like with only a small amount of new code. How could you use easy-to-adapt functions and arrays in the apps you create?

Summary

In this lesson, we explored some of the most important concepts in JavaScript, and you saw how JavaScript can make HTML5 Web apps more interactive and dynamic.

We discussed about client-server computing and the role of client-side scripting with JavaScript. You also discovered the fundamentals of JavaScript syntax and some of the building blocks of any JavaScript program, including variables, operators, and control structures. You saw how JavaScript uses the HTML DOM to access and manipulate HTML markup. And we explored the use of functions and arrays in the WatzThis app.

In Lesson 6, you'll learn about an important and exciting tool to make using JavaScript code in your apps much easier: the framework. Don't forget that you've got a quiz, FAQs, and assignment left to tackle in this lesson! See you next time.

Supplementary Material

JavaScript Basics Part 1

Create a new fiddle - JSFiddle

News JavaScript

Lesson 5 Assignment Solutions - YouTube

Lesson 5 FAQs

Q: Is JavaScript the same as Java? If not, how did they get such similar names?

A: No. When Netscape introduced JavaScript back in 1995, Java was becoming a very popular new programming language. Seeking to capitalize on the popularity of Java, Netscape named its new browser scripting language JavaScript. The two languages are not otherwise related, and they're actually quite different in many ways. In 1997, the standards organization Ecma International adopted a standardized version of JavaScript. Technically, a more correct name for JavaScript is ECMAScript. But, as JavaScript creator Brandon Eich pointed out, ECMAScript is an "unwanted trade name" that "sounds like a skin disease."

Lesson 5 Assignment

Now that you know a little JavaScript, revisit the WatzThis application and the modifications you made during the assignment back in Lesson 2. Knowing what you know now, try one or more of the following modifications. They're in increasing levels of difficulty, so don't worry if you can't complete all three.

Find this code:

if (color < light.length-1) {         
      color++;     
    } else {         
      color=0;     
    } 

and modify it to match this code:

if (color > 0) {         
      color--;     
    } else {         
      color=light.length-1;     
    } 

Before you try it out, can you guess how this will change the functioning of the autoFlip() function? Now, test it. Were you correct?

Make the autoFlip() function only flip to every other color in the light array.

Use document.getElementById().innerHTML to display the name of the current background color.

Hint:

If you start with this element:

<div id="mytext">Here is my text.</div>

And you run this code:

document.getElementById("mytext").innerHTML = "Some other text.";

The result will be this:

<div id="mytext">Some other text.</div>

- Lesson 5 Assignment Code Explanation -

Lesson 5 is the most difficult lesson in the course, so hang in there. Here are some tips and further explanation of the code that you might find useful and that may help with the assignment (take a look at other people's code too!). At the beginning of the JavaScript code, we create an array (like the pillbox) with each array element being assigned a different color. Once you've created an array, you can retrieve it's value by using a number. So, first you set the value of the array element:

light[0] = 'black';

and then later on you can retrieve that value to do something useful. For example, if you wanted to change the background color of the 'document' to black, you could do so with the following code:

In this case, document.body.style.backgroundColor changes the 'backgroundColor' CSS property of the document object (the web page). We're using the assignment operator (=) to tell document.body.style.backgroundColor what color to make the background. Because we set the first (0) array element of the 'light' array to 'black', saying
document.body.style.backgroundColor = light[0];

The function called flip() simply makes this document.body.style.backgroundColor statement even more flexible by letting you change which array element of the light array will be used.

It does this by taking a 'parameter', which I decided to call 'whichway'. It could have been called anything, however. Here's that flip() function again:

function flip(whichway){
document.body.style.backgroundColor = light[whichway];
stopFlip();
} 

The useful thing about functions is that once you write them once, you can use the same code multiple times. So, using the flip() function, you could change the color of the background to any of the values of the light array just by calling it with a different number between the parentheses.
For example:

flip(0); changes the backroundColor to "black".

flip(2); changes it to "red".

One way to call a function in JavaScript is to trigger it based on an event happening. In WatzThis, we call functions when buttons are clicked, but using the 'onclick' attribute:

<input type="button" id="OFF" class="bigButton" value="OFF" onclick="flip(0);">

So, when this button is clicked, the flip() function is called and the value of the parameter (whichway) is set to 0. Inside the function, the whichway parameter is used to determine which array element of 'light' is used.
Now that you understand functions and parameters better, take a look at the autoFlip function. The first thing this function does is to set the background color to the current value of the color variable. After that, it does a check (in the 'if' statement) to find out if there are higher possible values of color (or, if there are additional items in the 'light' array, in other words). This line: if (color < light.length-1) { is saying: "if the value of the color variable is less than the length of the 'light' array minus 1 then do this... When we say light.length we get a value back that's equal to the number of elements in the light array. So, if the light array was created like this:

light[0]="red";
light[1]="blue";

then light.length would be equal to 2. But, what we really want to know is what's the biggest possible number that we can use as the value of color, which would be 1 in this case. So, that's why the code says light.length-1.
setTimeout is a function that does something after a specified delay. In the case of this function, it calls the function it's a part of after a delay specified by the variable speed. So, this is how we create the loop and do the delay between iterations of the loop.

I hope that's helpful!