Quick Tag Editor
Intermediate Dreamweaver CS3: Lesson 02
Chapter 1:
Introduction
Welcome back! Have you been practicing HTML coding or taken a look at the CSS tutorial in the Supplementary Material section from the last lesson? If you haven't, give it a whirl. And if you have, today's lesson will validate the time you spent, because today we're going to be up to our ears in CSS.
Our goals for this lesson are pretty simple. First, we'll discuss the nature of CSS—what it is and how it works. Then, we'll take a look at the different methods of style sheet coding at our disposal. That'll lead us straight into Dreamweaver's CSS Styles panel, which is our central location for work with CSS in Dreamweaver.
To start, let me point out a convention I'll be using in this lesson and from here on out. Many features in Dreamweaver are accessed by right-clicking. This assumes you have a two-button mouse, of course. All PCs have two (or more) mouse buttons. The mouse devices that come with Mac systems are single-button, unless you happen to buy your own. I heartily recommend buying a multibutton mouse for your Mac. It gives you so much more speed and freedom when working in most applications.
Anyway, you'll see me say to right-click or CONTROL-click a lot in this course. Right-click assumes you have a two-button mouse, and CONTROL-click assumes you've got a single-button Mac mouse. Occasionally, I might say COMMAND-click, which means Mac users need to hold down that funky little curlicue button.
Are you ready? Let's get started!
Chapter 2:
How CSS Works
As we discussed in the previous lesson, CSS governs the presentation of a document—how it looks. But to really see how CSS works, we need to start with its partner, HTML. HTML defines a Web page's structure. So, let's start with something simple. With HTML, a paragraph is defined with the <p> and </p> tags, like this:
<p>Jack and Jill went up the hill to fetch a pail of water.
Jack fell down and broke his crown, and Jill came tumbling after.
In short, Jack is an irresponsible klutz, and Jill always gets jammed up
looking out for him. </p>
If we want to give this text a little pizzazz using old-school HTML, we need another tag—the <font> and </font> tags. These two tags define a region of text you want to set specific properties for. In HTML, we call properties attributes.
To specify the actual font, size, and color of text, we use the face, size, and color attributes, like this:
<p><font face="Verdana, Arial, sans-serif" size="2" color="#0000FF">
Jack and Jill went up the hill to fetch a pail of water.
Jack fell down and broke his crown, and Jill came tumbling after.
In short, Jack is an irresponsible klutz, and Jill always gets jammed up
looking out for him.
</font></p>
So, imagine that you have 200 paragraphs on a Web site. There would be 200 of these opening <font> tags throughout. That's a lot of edits to update any stylistic changes. With CSS, on the other hand, things would be considerably easier. You could create one style rule for all of the paragraphs, like so:
p { font-family: Verdana, Arial, sans-serif;
    font-size: 80%;
    color: #0000FF }
You can see the differences in syntax right away. What we call attributes in HTML are called properties in CSS. Instead of equal signs, we have colons, and instead of greater-than and less-than brackets, we have curly braces.
But now you may be asking where and how would you enter this CSS code into a document? Good question. In CSS, we have three methods of assigning our style rules to the contents of our HTML files. In order of sophistication, here they are:
Let's look at each one a little closer.
Inline Styles
Inline styles are the least sophisticated, as well as the least useful. The term inline simply means you write the CSS code in line with the HTML element you want the style to effect. This is done using the style attribute. For example, if we applied our style to a paragraph tag using the inline method, it would look like this:
<p style="font-family: Verdana, Arial, sans-serif; font-size: 80%; color: #0000FF">
Jack and Jill went up the hill to fetch a pail of water.
Jack fell down and broke his crown, and Jill came tumbling after.
In short, Jack is an irresponsible klutz, and Jill always gets jammed up
looking out for him.
</p>
Doesn't look much different than the old HTML. In fact, it isn't. It simply gives you access to the entire list of CSS properties, which HTML doesn't have. If you use this method, you still have to write style attributes again and again and edit them all when you want to make changes. No real improvement there.
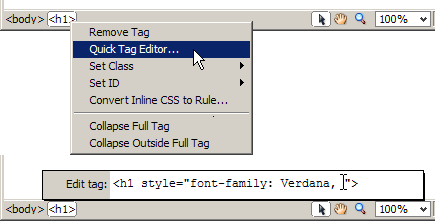
Plus, you can't even insert inline styles using the CSS Styles panel, which we'll be looking at in detail in just a few minutes. Instead, you either type inline styles into the code or use the Status bar's Quick Tag Editor. Simply right-click or CONTROL-click the tag you want to edit, and choose Quick Tag Editor from the pop-up menu. This opens a small code window you can type into just above the Status bar, as seen here:
Quick Tag Editor
Embedded Styles
Our next option is embedded style sheets. Here, you nest a full style sheet in the head section of the HTML file, like so:
<head>
<title>Embedded Style Sheet Example</title>
<style type="text/css">
<!--
p { font-family: Verdana, Helvetica, sans-serif;
      font-size: 80%;
      color: #000066;
}
-->
</style>
</head>
Notice the opening and closing <style> </style> tags. These mark the beginning and end of the style sheet. All CSS styles we place between them affect the HTML code for that specific document.
So, let's imagine that those 200 paragraphs I talked about earlier are spread across 10 HTML files. I'd have to write 10 embedded style sheets to get my styles working on each page. That would mean 10 edits to make updates. There's an even simpler method.
External Style Sheets
An external style sheet is just that—a file external to the HTML files it formats. It's simply a separate document with nothing but CSS styles rules in it. You can have as many rules in an external style sheet file as are needed to format everything in your site. For example, I did a site for someone last year with over 100 style rules in it.
The question then becomes this: How are these styles attached to all the HTML files in a given site? The answer is the <link> tag. Let's say I create a nice, hefty CSS file. I'd give it a name and end it with a .css file extension—for example my_styles.css. Then I'd place a <link> tag in the head sections of each of my HTML files, which would look like this:
<head>
<title>Embedded Style Sheet Example</title>
<link href="my_styles.css" rel="stylesheet" type="text/css" />
</head>
The attributes are self-explanatory. The href attribute is identical to the one we use to create hyperlinks. The value is simply the pathname to the CSS file. The rel attribute is short for relationship. It's simply called a style sheet. The last attribute is type, which identifies the file type we're using. Well, CSS files are written in plain text, using CSS syntax. Thus, we have the value text/css.
"All this code is giving me a headache," you say? Yeah, my eyes are getting a little tired too.
Let's put this technical stuff aside for a bit. After all, Dreamweaver is going to handle a lot of these details for us. And that's my incentive to move on to the next chapter, where we'll build some styles we can use as examples on our tour of the CSS Styles panel—where virtually all our CSS work will be done.
Chapter 3:
The CSS Styles Panel
Time to open Dreamweaver and start messing around! We're going to throw together a quick practice page, insert a couple of elements, apply styles to them, and use that as a launching point for examining the CSS Styles panel.
First, let's take a look at our Files panel. If yours isn't visible at the moment, just press F8. After completing the first assignment, the Files panel should display the contents of the site you named Intermediate Dreamweaver (which at this point should be completely empty, except for the images folder you ceated). If your Files panel isn't showing this site, click the drop-down menu in the upper left and select the Intermediate Dreamweaver site from the list. Your Files panel should now look like this:
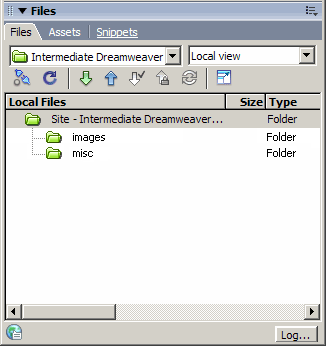
Files panel
Looking a little barren, isn't it? Let's create a little practice page we can futz around with:
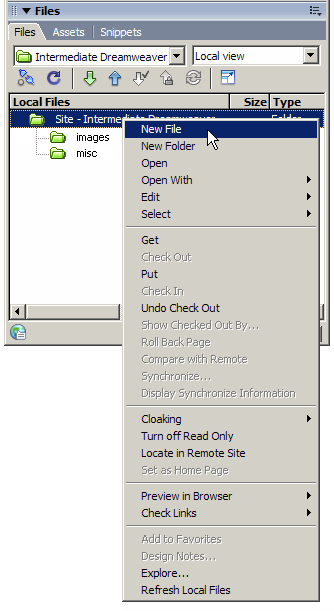
Files panel context menu
A new file will appear, with its filename highlighted, waiting for you to give it a legitimate filename. Name the file css_practice.html, as shown in the following picture:
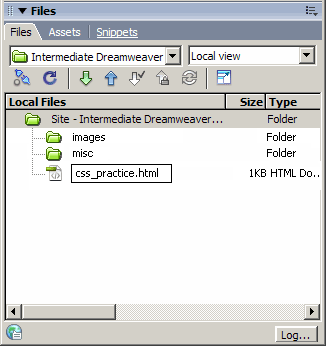
filename = css_practice.html
Double-click this file in the Files panel to open it in the Document
window. Before we get too carried away, let's give this file a title.
Go up to the Title field on the Document window, and enter Fun with CSS, like this:

Title field
Now, I want you to click in the Document window to place the cursor and type the same sentence again: Fun with CSS. Then, press ENTER or RETURN and type: I'm going to create some styles now.
Your page should look like this:
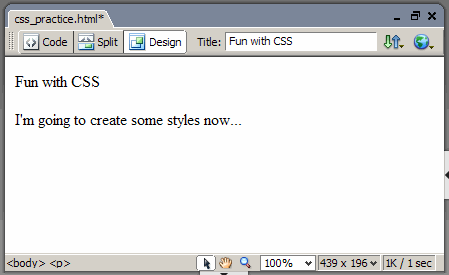
filename = Document window
So, we have two paragraphs in the page, created by virtue of entering the first line and then hitting our ENTER or RETURN key to enter the next line. Had we just stopped at the first line, we'd have to manually set that line to a paragraph using the Property Inspector. Let's use the Property Inspector to set that first line to a Heading 1. Simply select the line and use the Format drop-down menu to change the paragraph to a heading, as shown here:
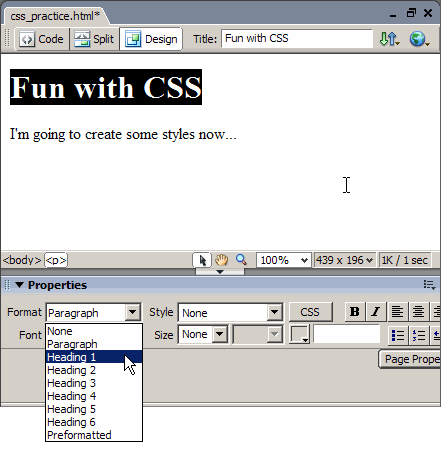
Format drop-down menu
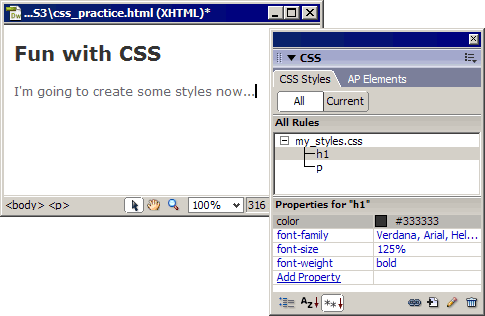
Now, we have our two elements. Time to create some styles. Bring up the CSS Styles panel by choosing Window > CSS Styles or pressing SHIFT + F11 on your keyboard. It should look something like this:
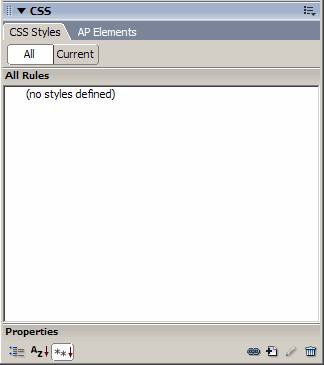
CSS Styles panel
Go over to the Document window and select your heading. If you look down on the Document window's Status bar at the Tag Selector, you'll see that the tag associated with your selection is highlighted. It's <h1>.
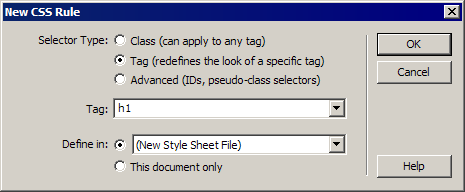
Now, return to the CSS Styles panel and click the New CSS Rule button, pictured below:
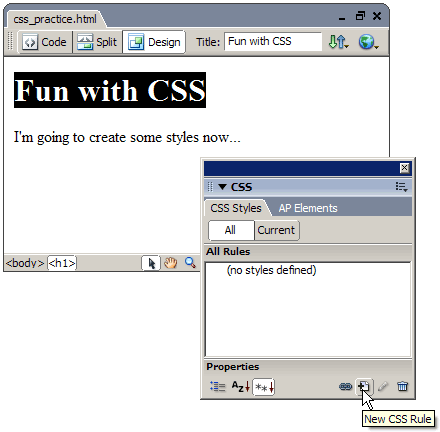
New CSS Rule button
This opens the following New CSS Rule dialog box:
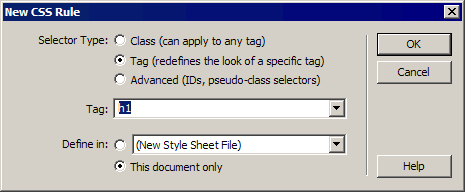
New CSS Rule dialog box
 Note Note If you got lucky, the dialog box came up prefilled, with the Selector type set to Tag and the Tag field showing h1. However, this only happens if the last style you made also used an HTML tag as a selector, so you may be stuck filling this one out yourself. No big deal. Assuming you know you want to redefine the properties of an HTML tag, just select the Tag radio button under Selector Type. Check the Status bar of the Document window if you're unsure as to what tag you need to enter in the Tag field. You'll also notice that the Tag field is a drop-down menu. It lists every HTML tag there is, in alphabetical order. Don't worry about the other two selector types yet. We'll look at those in greater detail later on in the class. |
The last thing you need to do is determine where this style is going to be written. The Define in: field gives you two choices out of the possible three we discussed in Chapter 2—either a new style sheet file (an external style sheet) or within this specific HTML document (an embedded style sheet). You can't insert inline styles from the CSS Styles panel.
First, we'll try an embedded style sheet. So, select This Document Only, and click OK. This brings up the CSS Rule definition dialog box shown here:
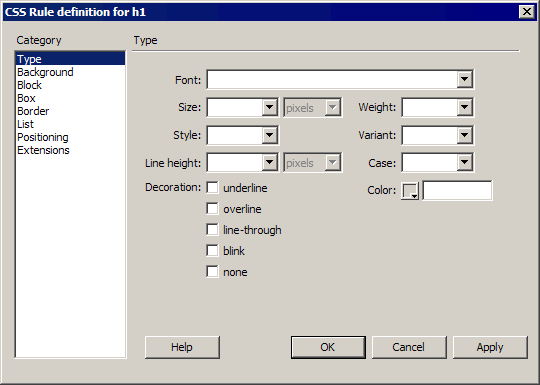
CSS Rule Definition dialog box
From here, I want you to set the following properties for our Heading 1:
To close the dialog box and commit your changes, just click OK. If you ever want to see how the style settings affect the page before you commit to them, click the Apply button. This leaves the dialog box open so you can make changes before clicking OK.
From here, select the paragraph beneath your heading, which reads, "I'm going to create some styles now." Follow the same steps outlined above to create a new style in this document. Hopefully, this time, because the last style you made redefined the properties of an HTML tag, the New CSS Rule dialog box will open prefilled. If not, you know what to do.
Give your paragraph these properties:
Not too shabby. With these styles in place, we can now begin an in-depth tour of the CSS Styles panel in Chapter 4.
Chapter 4:
A Closer Look
At the moment, your CSS Styles panel should look something like the example below on the left.
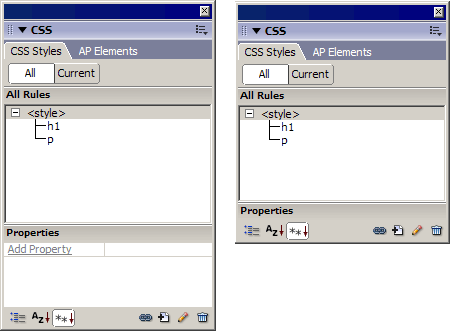
CSS Styles panel
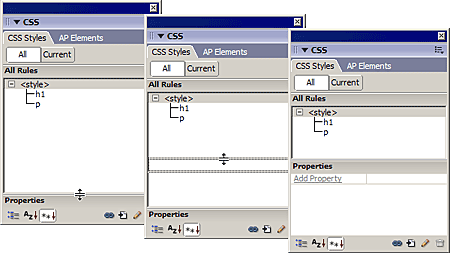
If, however, yours looks like the example on the right, just move your cursor over the edge of the window above the word Properties, until it becomes a two-headed arrow. Then, click and drag up, as shown below, so you can see the Properties section.
Properties section
All View and Current View
At the top of this panel are two buttons: All and Current. They control how the panel displays your styles. The default view is All, which shows a tree of all the styles you have that affect the document you have open in the Document window. In our case, it's showing us the two styles we made for the <h1> and the <p> tags, respectively.
If you select something in the Document window or click one of the styles in the tree and then click the Current button, the panel displays a summary of style information about that current selection. For example, I'll click the style we created for the Heading 1 tag and then click the Current button. This is what I see:
Current view
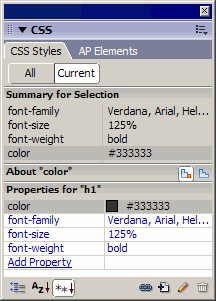
Personally, I like the All view better because it allows me to select any style the document is using without having to go back to the Document window to select something. Also, the Properties pane at the bottom shows all the same information (making Current view redundant), and the Properties pane is also interactive, allowing me to edit my styles there.
Editing Styles
Go back to the All view and click the h1 style on the tree. Then, look down at the Properties pane on the bottom half of the panel. To edit any of these properties, simply click once on a value on the right side. Doing so activates the fields, and you'll have access to all the same pop-ups you had in the CSS Rule definition dialog box. You can then make any modification you like, as you can see below.
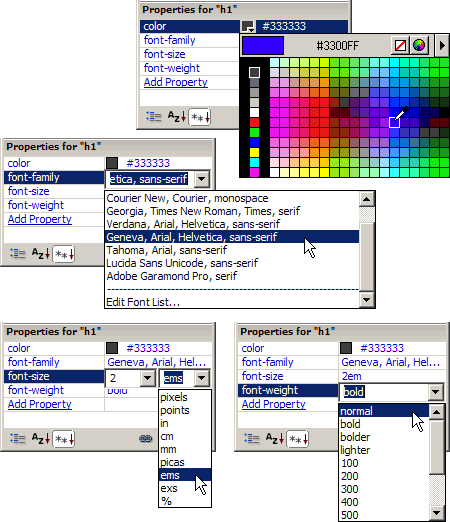
Properties pane
Adding Properties
You can also see the Add Property link there at the very bottom of the list of defined properties. Click this if you want to add a property you haven't already defined. You can either click and enter the name of the property or choose the property name from the drop-down list, seen here:
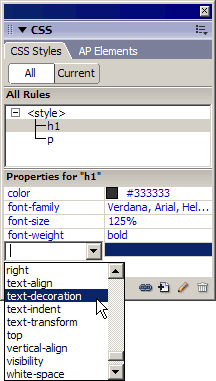
Add Property link
Deleting Properties
Deleting a property you've decided against is also easy. Simply right-click or CONTROL-click a property and choose Delete from the following context menu:
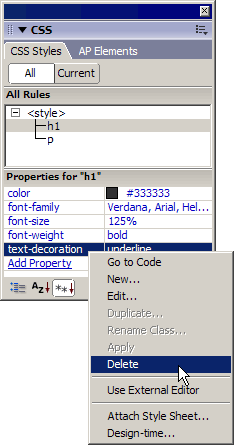
Delete property
The Rest of the CSS Styles Panel
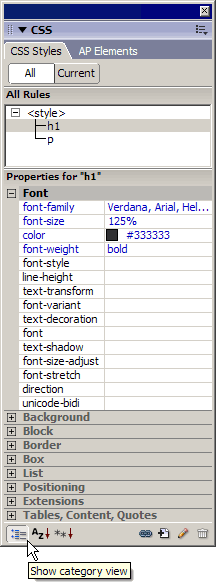
Along the very bottom of the panel, you'll see a series of buttons, one of which (the New CSS Rule button) we've already used. Let's examine what the others do. The first three buttons on the left side govern the display of the Properties pane. In order, they are Category view, List view, and Set properties view.
The default view we've been working with up to this point is the Set properties view—the third button in from the left. If you click the Category view button (shown below), the Properties pane changes to show you all possible properties by category, much the same way the CSS Rule definition dialog box is laid out.
Category view
Simply click the plus sign beside a category to expand it. Any properties in that category that are currently defined appear in blue with values to the right. To define a property not currently in use, just double-click the value field to its right to activate it and enter a value.
List view, pictured below, can make your head spin. It shows your currently defined properties for a given style up top, followed by every single property CSS has to offer in alphabetical order. It just seems to scroll on forever!
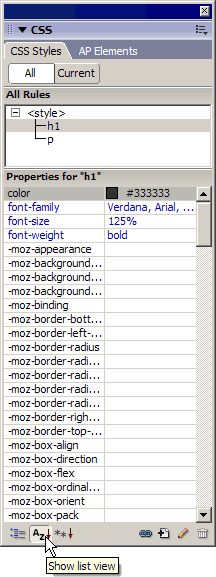
List view
Anyway, you stick with whichever view you like. I personally keep to the default Set properties view. It's clean, concise, and easy to read, telling me exactly what I have defined.
Now, if you look over on the right side of the panel, you see the four remaining buttons. The first button we run up against is the Attach Style Sheet button:
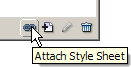
Attach Style Sheet button
Of course, to use this one we need to have an external style sheet to
attach to this HTML file. The assumption being that you created a
seperate style sheet document at some point and now need to attach it
to an existing HTML file.
Let's pull a fast one and make a new external style sheet by recyling the embedded one we have going right now. Just follow these steps:
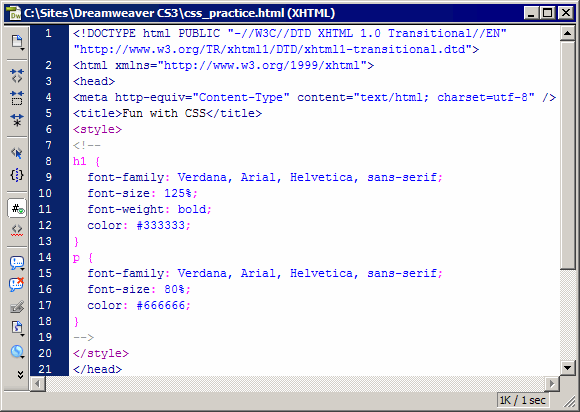
Code view
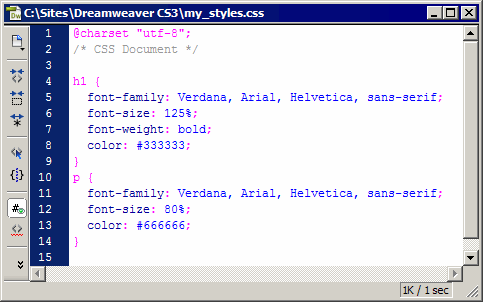
<style type="text/css"> <!-- h1 { font-family: Verdana, Arial, Helvetica, sans-serif; font-size: 125%; font-weight: normal; color: #333333; }p { font-family: Verdana, Arial, Helvetica, sans-serif; font-size: 80%; color: #666666; } --> </style>
Deleted style tags
If you switch your css_practice.html file back to Design view, you'll see that there are no longer any styles affecting the page, and the CSS Styles panel is empty. This new style sheet file is exactly what would have been made had we chosen Define In: New Style Sheet File back in the New CSS Rule dialog box. Dreamweaver would have attached it automatically to the first HTML file we'd been working on when we created it, but every subsequent HTML file in the site would require that we attach it manually—which is what we're going to do now.
With your css_practice.html file active in the Document window, click the Attach Style Sheet button. A dialog box of the same name appears, and in this instance, should be prefilled with the style sheet you just created. You see, Dreamweaver checks the local root folder for any .css files, assuming you plan on using one already in the site.

Attach External Style Sheet dialog box
Under Add as:, the Link radio button is selected. Obviously, there's more to this dialog box, and we'll get to those features in upcoming lessons. All that's left to do is click OK. What you'll then notice is that the heading and paragraph are once again styled accordingly, and the CSS Styles panel now references the external style sheet file in its tree.
css_practice.html
If you hop over to Code view in your Document window and look up in the head section, you'll find that same line of code we discussed earlier in the lesson:
<head>
<link href="my_styles.css" rel="stylesheet"  type="text/css" />
</head>
Okay, we have two buttons left, and they're pretty self-explanatory. The one that looks like a pencil is the Edit Style button. It's real simple to use. Just select a style from the tree above, click the Edit button, and the old CSS Rule Definition dialog box we kicked this whole thing off with pops up. Use it to make changes.
The last button looks like a trash can, and—you guessed it—it's for deleting styles. Select a style on the tree, and click Delete to remove it. If you select the .css file at the top of the tree, the Delete button simply deletes the <link> tag from the head section of the currently active HTML file. If you're using an embedded style sheet, like we were earlier, and you select the <style> tag at the top of the tree, the Delete button deletes the entire embedded style sheet.
Well, that's it for the CSS Styles panel for now. Let's wrap up this lesson with a summary of what we've learned.
Chapter 5:
Summary
We covered a lot in this lesson. I hope it helped you get comfortable with the CSS Styles panel and many of the options that come along with it. We began with a short discussion of the mechanics behind CSS and how it compared to HTML. We looked at simple HTML formatting and checked out the equivalent CSS syntax.
Next, we examined the three different types of style sheet coding: inline styles and embedded and external style sheets. And we discussed the strengths and weaknesses of each. Last, we created two simple styles and toured the CSS Styles panel. We saw how to view the various properties, how to use the panel to make faster edits, as well as how to delete styles. Along the way, we saw how to create an embedded style sheet, as well as attach an external one.
In our next lesson, we'll take a look at the meaning of the word cascade and take our first steps into the world of CSS layout by examining various methods for creating navigation bars. See you there!
Supplementary Material
|
CSS Zen Garden http://www.csszengarden.com/ |
| Visit this site for a demonstration of what can be accomplished visually through CSS-based design. |
|
The WestCiv Guide to CSS http://www.westciv.com/style_master/academy/css_tutorial/introduction/css_intro.html |
| Check out this site for everything you ever wanted to know about style. |
FAQs
Q:
I noticed that the field in the New CSS Style dialog box, where we'd
choose New Style Sheet File, there is a drop-down menu. What other
options are there?
A: If you had an existing external style sheet and clicked the New Style Sheet button at the bottom of the CSS Styles panel, that style sheet filename (and any other style sheet files in the local site) would fill that drop-down menu, allowing you to define the new style in any of those CSS files.
Assignment
Here's an HTML file for you:
Right-click or CONTROL-click this link to download the more_practice.html file into your misc folder.
Then, hop over to Dreamweaver. The new file should be visible in your Files
panel. Double-click it there to open it in a Document window.
Go over to your Document window and switch to Code view. I want you to take a tour of the tags used in this file. Here they are:
One Heading 1 (<h1>) tag
Three Heading 2 (<h2>) tags
One Heading 3 (<h3>) tag
A lot of paragraph (<p>) tags
Three unordered list (<ul>) tags
One <pre> tag
Here's what I want you to do:
Using
the techniques we discussed in class, define fonts, sizes, and colors
for all of these tags. Define them in a new external style sheet.
This means choosing that option from the Define in: drop-down menu the first time you create a style, as shown here:
Define in: (New Style Sheet File)
Give
the style sheet some logical filename (just don't use capital letters
or spaces), and save it into the misc folder you created. You'll be
shown a dialog box (below) to do this in when you click the OK button.
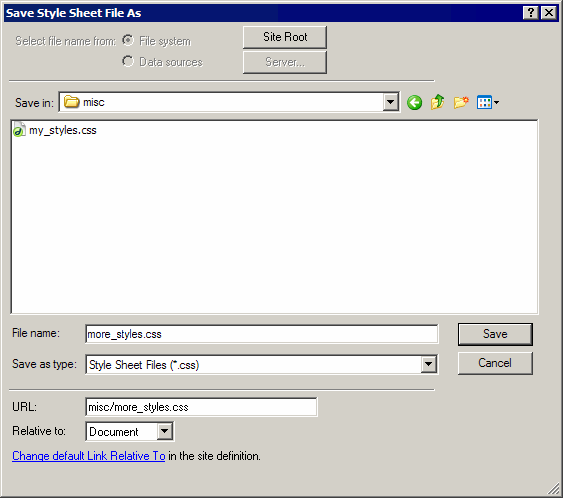
Save Style Sheet File As
I
also want you to create a style for the <body> tag. In this case,
simply define a background color for it. The key here is to come up
with text and body colors that accent each other and facilitate
readability. Anyone using fuchsia and lime green is gonna get it!
Think
of this assignment as digital finger painting. You can be messy here.
You're simply experimenting with the tools. If you run into any
trouble, hit a snag, blow up your machine—anything—just holler in the
Discussion Area.