 Note
Note Understand that many programs use the word template. So do other disciplines in Web development. A Dreamweaver template only works for and in Dreamweaver.
Intermediate Dreamweaver CS3: Lesson 05
Chapter 1:
Introduction
In the last lesson, we finalized our CSS layout. We've got a header with our logo and navigation in place, and we've got a two-column area beneath it for our content and sidebar. What we don't have is the content to go inside it, but we'll get to that. What I want to do in this lesson is take a little sidestep into the world of Dreamweaver templates, since this is the point where you'd want to build one when creating a site.
Templates become a real asset when you have other people working on site content who are not Web designers themselves. A Dreamweaver template allows you to fix the layout of pages so inexperienced folks can't mess them up when they're updating content. No more, "Oops, Boss! I went to update the tip of the week message, and now the links have disappeared!"
And even if you're the sole person building and maintaining a site, learning how to work with templates is still a good idea, because you never know when you'll need to enlist the help of someone else. So now is the right time to learn about them.
In today's lesson, we'll learn just what Dreamweaver templates do, how to build them, and how to apply them to the pages of your site.
See you in Chapter 2!
Chapter 2:
What's a Dreamweaver Template?
In Dreamweaver, a template is just another type of file. These files end with a .dwt file extension, which stands for Dreamweaver Template, logically enough. These .dwt files consist of standard page code, but they also include some Dreamweaver-specific comment tags that delineate template regions. A template region tells Dreamweaver where to allow editing and where to prohibit it. After a template is applied to a page, any part not marked as a specific template region is off limits to anyone editing that page.
 Note Note Understand that many programs use the word template. So do other disciplines in Web development. A Dreamweaver template only works for and in Dreamweaver. |
Another plus that comes with Dreamweaver templates is they are dynamically updatable. Therefore, if you edit the .dwt file, Dreamweaver will carry those changes over to any file the template has been applied to.
Creating a Dreamweaver Template
You can create a template from an existing Web page (the way we'll do it for this site), or you can open a new blank .dwt file and build one from scratch. It doesn't really matter. I chose the first way because of the order of our lessons up to this point. The first thing I want you to do is open your index.html file from the last assignment:
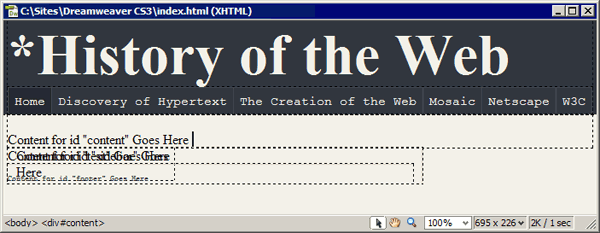
Your index.html page
Go ahead and select the line that reads, "Content for id "content" Goes Here" and delete it. The other DIVs should then hop into place, as shown here:
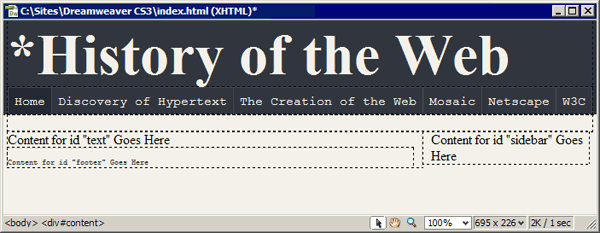
DIVs in place
Now, we're ready to turn this page into a template:
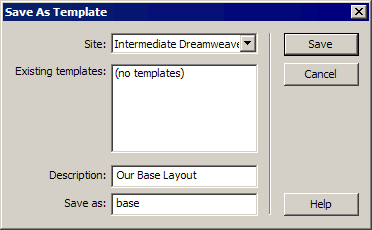
Save As Template dialog box
Adding Template Regions
Once you've created a template, you need to add template regions. Otherwise, if you apply the template to a new page, you won't be able to add any content. We're going to add two different types of regions to this template:
Inside the text DIV, each of our pages will begin with a Heading 1 and be followed by body text. So, before we start inserting editable regions, let's place some example of that content in the template first:
Your template should now look like this:
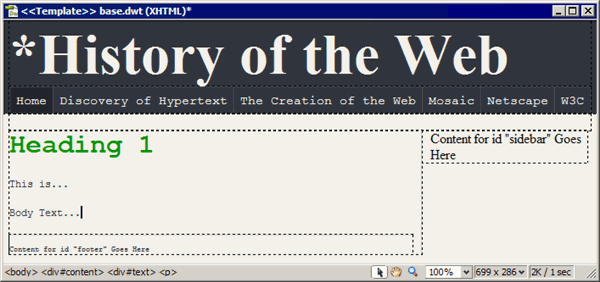
Base template
What we're going to do is turn the Heading 1 into an editable region. This will ensure that every page based on this template will begin with <h1> and </h1> tags that can't be removed. However, text in between them will be updatable.
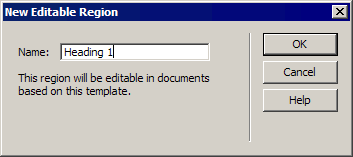
New Editable Region dialog box
Never use special characters in the Name field. It prevents Dreamweaver from accurately updating pages based on your template.
 Note
Note
You now have a new editable region visible in your template, outlined in aqua blue, with a tab in the upper left displaying the name you gave the region in the previous dialog box:
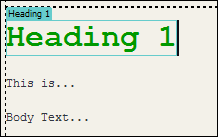
Editable region
If you switch to Code view, you'll see Dreamweaver has placed some comments inside the tags that make up the Heading 1, delineating this zone as an editable region:
<h1><!-- TemplateBeginEditable name="Heading 1" -->Heading 1<!-- TemplateEndEditable --></h1>
Now, if that aqua blue highlight just doesn't do it for you, you can always change the color (as well as a slew of other visual aids) in your Preferences dialog box. Just choose Edit > Preferences (Win) or Dreamweaver > Preferences (Mac), and go to the Highlighting category, as shown here:
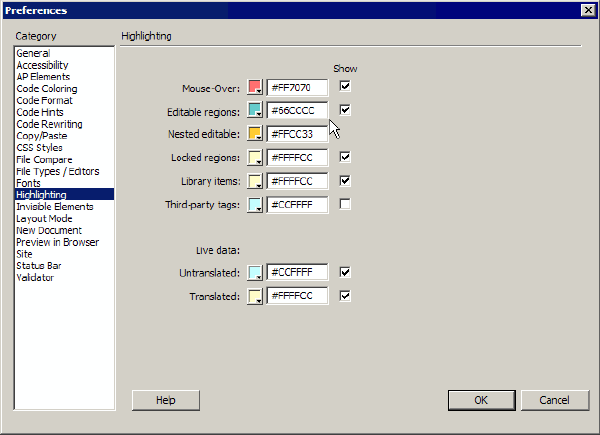
Preferences dialog box
Our next order of business is inserting an editable region beneath the heading, where we can enter our body text. As you just saw, selecting a single element (like our Heading 1) and inserting an editable region places the region between the associated tags. This is why I had you enter two paragraphs. Had we just entered a single paragraph, selected it, and then inserted our next editable region, the body text would be placed inside the paragraph, and we'd have a big mess when we tried to add multiple paragraphs of text.
Let's create our first editable region now:
The footer and sidebar DIVs will remain fixed, with the same content in them from page to page. Because we're borrowing content from another Web site, we need to give that site credit:
Last, we'll make that URL a physical link back to the original site our page content comes from:
Now it's time to save our template. Choose File > Save or CTRL + S (Win) / COMMAND + S (Mac). You should see the following warning:
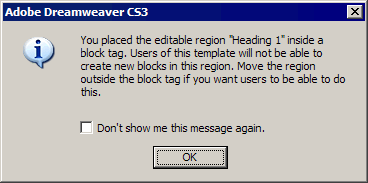
Warning
It's telling us something we already know. Our Heading 1 editable region is inside a block tag (the <h1> and </h1> tags). We did this on purpose, for reasons already discussed, so just click OK. Your template should now look like this:
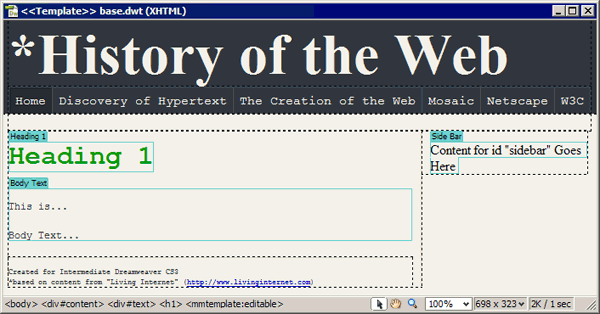
Editable regions
With our editable regions out of the way, it's time to set up that editable tag attribute we talked about earlier.
So, let's move on to Chapter 3 and get to it.
Chapter 3:
Making a Tag
Attribute Editable
As we mentioned in the last chapter, you can let template users modify specific tag attributes in a document while preventing them from editing the rest of the tag or the content created with that tag. For example, in our style sheet, we created three style classes for our anchor tags that affect the display of the navbar links:
These classes are applied to the anchor tags using the class attribute (<a href="#" class=" [classname] ">). So, we want to make that attribute—and nothing else—editable so our link styles can be modified appropriately. We'll go through the links one at a time, selecting the anchor tags themselves and then modifying the template so the class attribute is editable for each one:
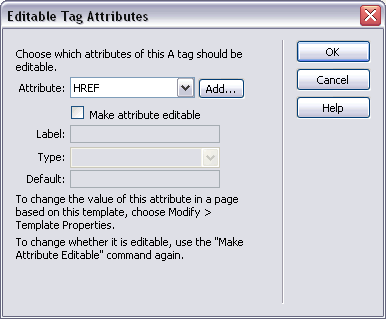
Editable Tag Attributes dialog box
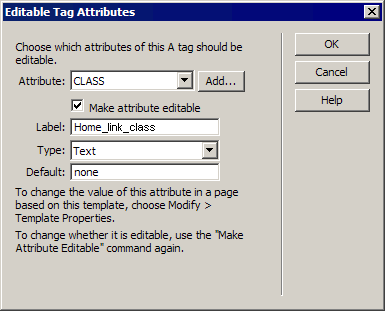
Completed dialog box
We can leave the Type drop-down menu set to Text, since the values none, present, end, and present_end are all text strings. However, you do have a number of possible value types you can set to fit specific circumstances:
We now have five more links to set editable attributes for. Only the last link has the class attribute already defined for it, so we'll have to click the Add button next to the Attribute field in the Edit Tag Attributes dialog box when modifying those other links. Doing so opens a little dialog box (shown below) where we'll type class and then click OK to return the original dialog box and finish our modifications.
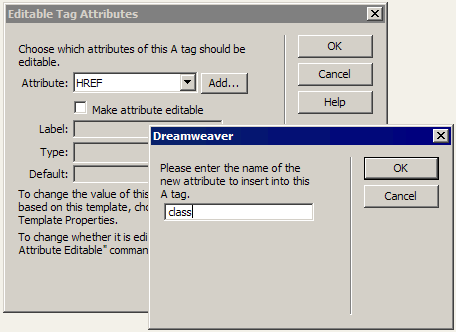
Adding an attribute
Here are the various values I want you to use:
The Discovery of Hypertext Link:
Label: Hypertext_link_class
Default:> none
The Creation of the Web Link:
Label: Web_link_class
Default: none
Mosaic Link:
Label: Mosaic_link_class
Default: none
Netscape Link:
Label: Netscape_link_class
Default: none
W3C Link:
Label: W3C_link_class
Default: end
My W3C Link Disappeared!
Nope—it's still there! When you create the last modification, a token string replaces the class attribute value for the final link, so Dreamweaver can do a find-and-replace when the template user specifies the actual class value they want to use. Consequently, the link has no real class attribute value in the template. But it will have the .end class by default in any .dwt file you apply the template to. Not pretty in the template Document window, I realize, but it's simply the nature of the beast, I'm afraid.
One last thing to do—save your template file!
Okay, we've created a template and assigned editable regions to it. Then, we made the class attribute editable on all our navbar links. What we haven't done is discuss basic template maintenance.
So, let's move on to Chapter 4 and look at that.
Chapter 4:
Template Editing
Up to this point, I've walked you through very specific template operations. But in doing so, I've left out some template basics. Here are a few examples:
How to Select Editable Regions
Selecting an editable region is pretty straightforward. Click the tab in the upper-left corner. The Property Inspector will change to show you what you've selected, as shown here:
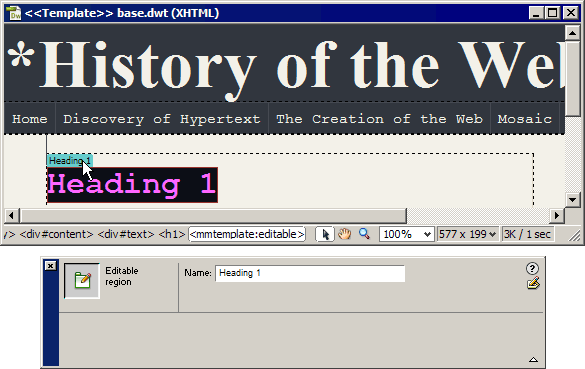
Selecting editable regions
How to Rename an Editable Region
Also fairly simple. Once you have the regions selected, simply enter a new name in the Name field of the Property Inspector:
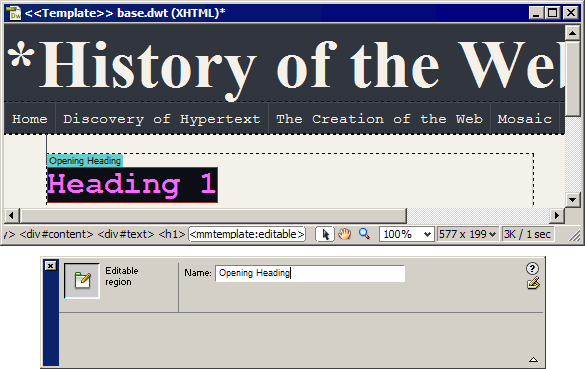
Renaming an editable region
How to Remove an Editable Region
When you want to remove an editable region from a template, just use the Remove Template Markup command, and then, take either of these steps:
How to Apply a Template
You can apply a template to your documents from either the Assets panel or the menu bar. You can drag the template onto an open Document window, as shown below, or select the template in the Assets panel and then click the Apply button in the panel's lower-right corner.
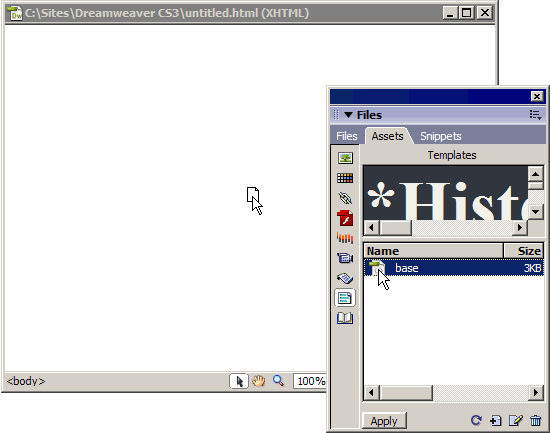
The Assets panel
If you choose to use the menu bar, the command is Modify > Templates > Apply Template to Page, and you'll be prompted to select the template you want to use.
Applying a Template to a Pre-existing Page
Say you have a document that contains existing content (such as text and images). If you then apply a template to it, Dreamweaver asks you which editable region you'd like the content placed in, as shown here:
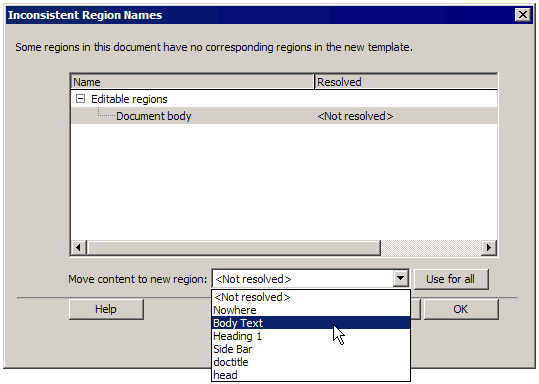
Inconsistent Region Names dialog box
If the document is based on some other template, the dialog box will show a listing of the original editable regions on the left. Then, you can use the Move content to new region drop-down menu to work down the list and figure out to which new region the content should be moved.
How to Edit a Template
Making
changes to a template is very simple. Open the template (.dwt file) as
you would any other document, and make any changes that are necessary.
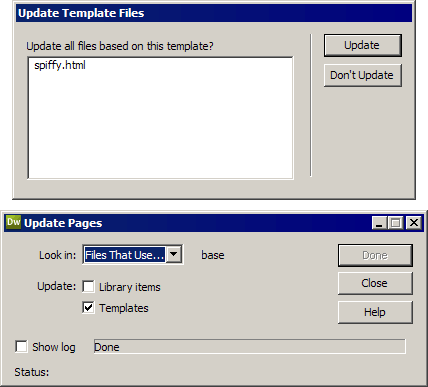
Then save the template. Next, Dreamweaver will ask you to update any
pages that are based on the template. Click the Update
button to update each document based on your modified template. When
Dreamweaver finishes the updates, it displays a log indicating which
files were updated, as shown here:
Update files
Okay, we've got the maintenance and implementation issues out of the way.
Let's roll on over to Chapter 5 and wrap this lesson up!
Chapter 5:
Summary
I hope you found today's lesson valuable. Dreamweaver's templates can be a lifesaver when you need to give others access to a site that's under construction. Let's look back at what we covered.
Over the course of the lesson, we learned how to build a template from an existing page layout, assign editable regions, include editable tag attributes, and apply our templates to new and existing documents. We found out how to select editable regions, modify them, and remove them from our templates. In our examination of Dreamweaver template files (.dwt files), we discovered they contain both normal page code and Dreamweaver-specific comment tags and token strings.
Additionally, we learned that, by using templates, we can limit a page's editable content to specific regions, allowing us to fix areas of the layout so an inexperienced user can make updates without breaking anything. We also learned that Dreamweaver isn't the only program or discipline to use the word template, so we need to be careful and understand that a Dreamweaver template only works with Dreamweaver.
If you have any questions, by all means, visit the Discussion Area and post them. Now that we have our template in place, we can start constructing our site pages—which is what our assignment is all about.
And
ever wonder about creating Web content for cell phones, PDAs, and other
non-traditional media? It's all in how you style. In Lesson 6, we'll
return to our study of CSS and examine device-dependent style sheets.
Supplementary Material
|
Guidance on When to Use Templates, Library Items, and SSIs http://www.adobe.com/devnet/dreamweaver/articles/ssi_lbi_template.html |
| There are several techniques that will help you save a lot of work when developing Web sites, especially when your sites' Web pages reuse the same content over and over again. These techniques allow you to make an update in one place and have that change update many pages. |
|
Site Planning and Publishing: Using Templates http://www.adobe.com/support/dreamweaver/templates.html |
| This site provides template support, courtesy of the Dreamweaver Support Center. |
FAQs
Q: Can I use Dreamweaver templates with FrontPage or GoLive?
A: No. Dreamweaver templates only work with Dreamweaver.
Assignment
Let's create the rest of our site pages and apply our base template to them.
Creating Our Files
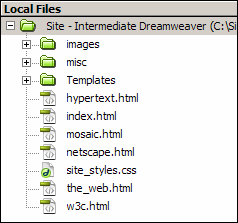
The first order of business is to create the new blank files. Using your
Files panel, add the following files to your local root folder:
Your Files panel will look something like this when you're done:
Your files
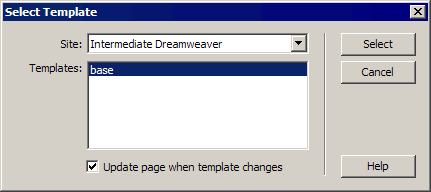
Applying the Base Template
For the most part, this will be simple, but because our index file and our
base template are virtually the same file, we have to take an extra
step in applying the template to this page:
Select Template dialog box
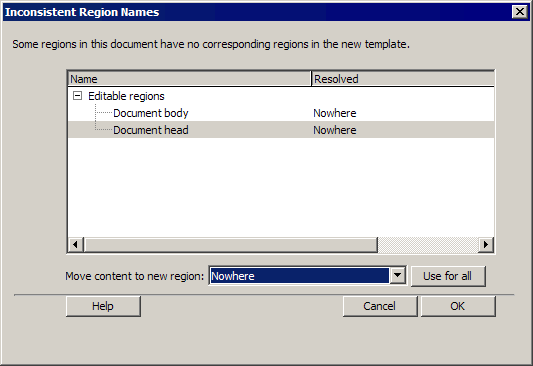
Because
our index.html file is already loaded with content, Dreamweaver wants
to know which editable region we want this content placed in. Well, we
don't want it placed anywhere. The content currently in index.html and
in our template is the same:
Inconsistent Region Names dialog box
Now, need to set the class attribute for the Home link's anchor tag,
since the index.html page is our home page and we want users to know
that's where they are.
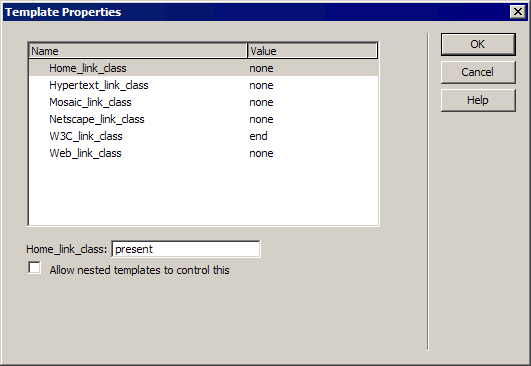
Template Properties dialog box
 Note Note It would be great if we could select from a list of possible attribute values, but Dreamweaver hasn't implemented such a feature yet. It's up to us to know what style class names we can use here. Maybe in CS4? |
Home = index.html
Discovery of Hypertext = hypertext.html
The Creation of the Web = the_web.html
Mosaic = mosaic.html
Netscape = netscape.html
W3C = w3c.html
The Rest of the Pages
Now,
take care of the other five pages. Simply open them in Document
windows, apply the template, and set the corresponding anchor tag
class. Each of the links, except the W3C link, will take the present
class, just as index.html did. The W3C link, in w3c_web.html , will take the end_present class.
Now, you may be wondering about page content. I thought I'd give you a
little taste of what working in a design shop is like. When I first
started laying out pages, all my copy was given to me in text files. I
simply copied and pasted it into my layouts. We'll do the same thing
here.
Below is a link to a Zip file containing six text files,
one for each of our pages. In them, you'll find a value for each
document title, the opening Heading 1, the body text, along with any
links I want you to insert. Simply copy and paste these into their
corresponding pages.
To be sure that your copy and paste features are properly set for this exercise, choose Edit > Preferences (Win) / Dreamweaver > Preferences (Mac), and then, select the Copy/Paste category in the Preferences dialog box. Make sure your Edit > Paste preferences are set to Text with structure (paragraphs, lists, tables, etc.), as shown here:
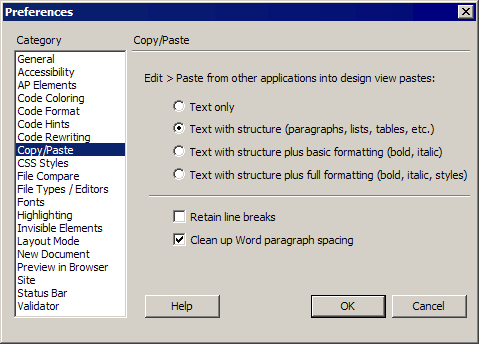
Preferences dialog box
Right-click or CONTROL-click this link to download the L05_assignment_files.zip.