Have
you been to YouTube lately and watched any bizarre amateur (and not so
amateur) videos? Maybe you've been at Amazon.com previewing music
before buying your favorite band's new CD. These types of audio and
video files are often referred to as media objects, and in
today's lesson, that's exactly what we'll be discussing. We'll talk
about what media objects are, what software is required to play them,
and the various techniques Dreamweaver has for placing this type of
content in the sites we build.
So, when you're ready, move on to Chapter 2, and let's get started!
A media object is any type of file that requires the browser to call upon a helper application
in order to view or play it. For example, Flash, QuickTime, Windows
Media, RealMedia, and MPEG audio and video are all examples of media
objects. So are Adobe PDF files, though they're not quite as
interesting as audio and video tend to be. The browser, which can only
display HTML and CSS content on its own, has to call on the Flash
Player, QuickTime Player, Windows Media Player, and others in order for
you to experience these different file types.
Often times, you'll hear something like, "Oh, you need a such-n-such plug-in
in order to view that . . ." Strictly speaking, the term plug-in is
Netscape-specific. The Netscape plug-in is the mechanism that allows
different media players to communicate with the Navigator browser and,
thus, play things like QuickTime files inside the browser window.
In
a nutshell, Netscape made some modifications to their browser and said
to the manufacturers, "Here's how this mechanism works. All you have to
do is follow these guidelines, and then you can program a plug-in for
our browser. Then Web site visitors can experience your media files
right there in the browser window." And that's exactly what the media
player manufacturers did—they wrote plug-ins. Lots of them.
Microsoft
needed to keep up with the competition, so they created their own
mechanisms for Internet Explorer. They call their required widgets ActiveX controls.
Today, when you download a player or install it, the installation
process typically involves updating the various plug-ins and ActiveX
controls needed for whatever browser you have installed on your
computer.
 Note Note Most
browsers come with a series of plug-ins and ActiveX controls already
installed. For example, the Adobe Flash Player comes preinstalled on
Internet Explorer, Firefox, Mozilla, Netscape, Safari, and Opera. In
short, every major browser there is.
|
This gives Flash possibly the largest installed base
(number of users with the software) of any media player currently in
use. In fact, that's why YouTube went with Flash instead of QuickTime,
Windows Media, or RealMedia. Of course, updates and upgrades come out
all the time, and it's up to the user (and the Web designer) to keep on
top of this stuff. As the lesson progresses, we'll talk more about
making your media-dense pages user-friendly.
For now, let's move on to Chapter 3 and talk about linking to media objects.
Hyperlinks
are the simplest way to give your audience access to whatever media
files you want to incorporate into your sites. That's right—just link
to a media file the same way you'd link to any other file. Let's give
it a try.
Here's a link to a Zip file containing some example files we can use:
Right-click or CONTROL-click this link to download the L08-samples.zip folder.
Download the Zip file above to your desktop, and unpack the inner files into your misc folder within your local root. Leave the dylan.html file there, create a new folder inside your misc folder, and name it media. Place all the non-HTML files that came in the Zip into that folder.
Now, go ahead and open dylan.html
(shown below). You see a heading followed by a line of text—the title
of a Bob Dylan song—which we'll turn into a link to the corresponding
MP3 file that's now in your media folder.
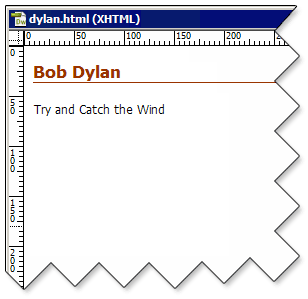
Line of text awaiting a link
Select the text to format it as a link (shown below), and then click the folder icon beside the Link field on the Property Inspector.
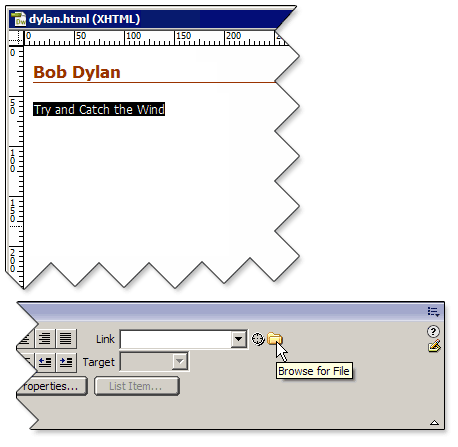
Assign the link
In the resulting dialog box, locate and select the MP3 file whose filename corresponds to the name of the song.
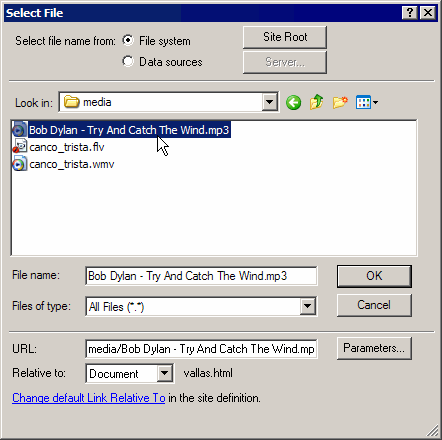
Select the file
Then, preview the page (shown in the following figure), and just click the link.
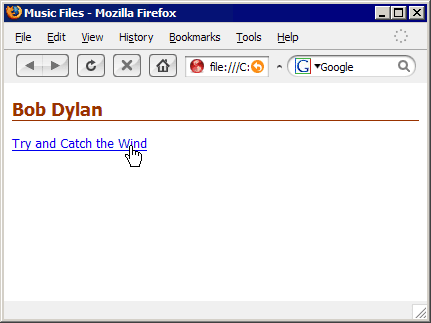
Preview the page
Depending
on how your browser is set up to handle media files, the file will
begin to play, and you'll either see an audio controller bar appear, or
your browser will launch the helper application in stand-alone mode and
play the file, as shown below.
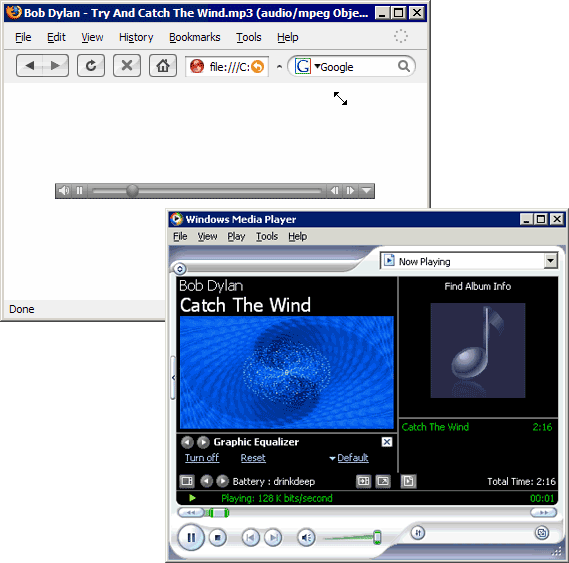
Controller bar or media player
By embedding,
I mean inserting a media object into a page so the user sees the video
(or an audio controller bar) amongst the rest of your page content,
similar to the way you insert images into pages. To embed media
objects, use the Insert Plugin command, which is found under the
drop-down menu of the Insert Media button on the Common tab of the
Insert Bar, as shown here:
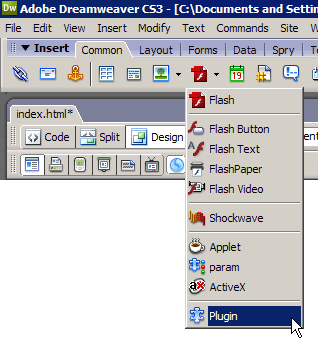
Insert Plugin
 Note Note Whatever
option you last chose under the Insert Media button hops to the top of
the drop-down menu, becoming the default button value until you make a
different selection. So, for example, from this point on, the Insert
Plugin command would take the lead spot as the Insert Media button. |
Insert Plugin
is a bit of a misnomer, since you aren't actually inserting the
plug-in. You're inserting a file type that requires a plug-in or
ActiveX control.
Let's embed the Bob Dylan MP3 file:
- Delete the text link to the MP3 file in our dylan.html document.
- With the cursor still in the Document window, click the drop-down arrow next to the Insert Media button.
- Select Plugin.
- In the resulting dialog box, select the MP3 audio file, as we did before.
- Click OK.
Unfortunately,
what appears in the Document window isn't all that useful. What we get
is a little 32 x 32 pixel square with the plugin icon in it, as shown
here:
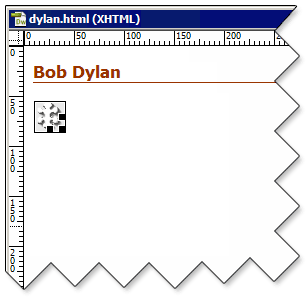
Plugin icon
What
this is telling you is Dreamweaver is reserving a 32 x 32 pixel space
for the controller bar of whatever audio helper application a visitor's
browser is set up to use. That's pretty useless. I know from experience
that the average controller bar needs to be at least 16 pixels high and
at least 50 pixels wide. So, those are the minimum values I'd set so
users can actually see the controls.
So, we need to go down to the Property Inspector
and make some changes (see below). We'll leave the height alone because
I know that the Windows Media Player controller is about that high and
the QuickTime controller is about 16 pixels high (so, 32 will give me 8
pixels of white space above and below). The thing to realize is that
you have to account for every possible player a visitor could possibly
be using. I've changed my width to 100 to show you what a QuickTime
player needs, but that may be too narrow for a user with Windows Media
player.
It's
a real hassle to reconfigure your machine to test each player. At the
professional level, you'd have a series of machines set up to test each
possible look. I can tell you that Windows Media Player won't be happy
with a value under 300, so use that here.
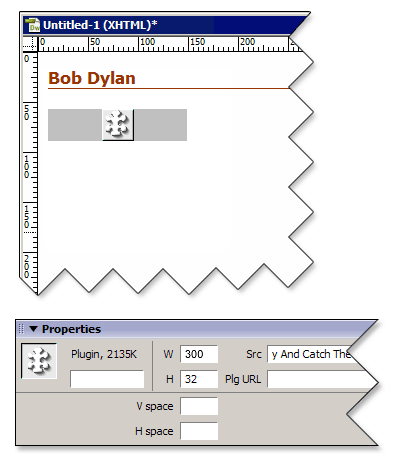
Width and Height
Now we can preview the page in a browser. The song should begin playing, and this is what we see:
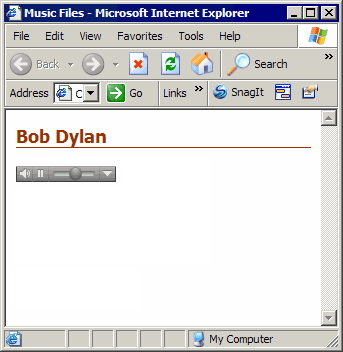
Controller bar
To
insert a video MPEG, QuickTime, AVI, or WMV file instead, the process
would be virtually identical. The only major difference would be the
dimension values we set. We need to know the dimensions of the video
plus the relative size of the player controls.
For
example, we have a WMV video of Horace Vallas that is 320 x 240. After
taking some measurements, I know we'll need about another 44 pixels of
height to accommodate a Windows Media Player controller bar. If a
visitor is using QuickTime to view MPEG video, we only need 16 pixels
for the controller bar, so the other 28 pixels will become white space
for them.
So,
adding 44 pixels onto the 240 gives us a total height of 284. Thus, our
dimensions will be 320 x 284. Let's embed that video clip:
- Open vallas.html.
- Place the cursor still in the Document window, beneath the heading.
- Click the drop-down arrow next to the Insert Plugin button.
- In the resulting dialog box, select the canco_trista.wmv file.
- Click OK.
Just
as before, the media object comes in at 23 x 32, so it's off to the
Property Inspector we go. Set the width and height to 320 x 284, save
the file, and then preview it in your browser. The end result looks
like this:
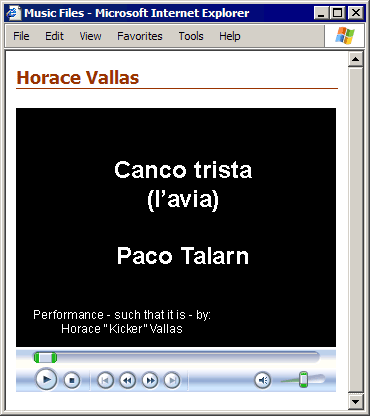
Embedded video
We
just saw how we could embed audio and video files and have them start
playing the minute the page loads. But, what if we didn't want the file
to begin playing right away? What if we wanted to give the user the
option to play (or not play) the file? In that case, we'd need to set
some parameters for the file. What's a parameter?
Let's talk HTML for a second:
The
current standard for embedding media objects uses the <embed>
tag. Though we use the term parameters, all we're really doing is
setting a series of attributes for the <embed> tag. It's similar
to the width and height attributes we looked at a moment ago.
The
various attributes that we call parameters allow us to control how the
user interacts with the media. Does the file start playing
automatically? Can the user see the controller bar? Can the user save
the file manually? All these are covered by parameter values.
Realize
that every media object file type (QuickTime, WMV, RealPlayer) has its
own set of parameters, and unfortunately, the Property Inspector
doesn't place them all out there for us to see and manipulate. You've
got to know them and enter them manually into another dialog box or
into the code itself. Lucky for us, most media player manufacturers
have been nice enough to use the same basic set of parameters and only
throw in a few unique ones that capitalize on some special feature only
their file type possesses. While it isn't a perfect example of
standardization, it's still pretty good.
For example, to set up the embedded audio file so it doesn't start playing automatically, we'd use the autostart parameter and set it to false. How do we do that? Easy. Just follow these steps:
- Open the dylan.html file, if you've closed it, and select the embedded media object in the Document window.
- Go down to the Property Inspector, and click the Parameters button to launch the Parameters dialog box.
- From here, you can either click the Add (+) button or simply click in the empty space right under the word Parameter and type in autostart.
- Then, you can either press the TAB key twice to move over to the corresponding Value field or just click there and type false.
- Finish by clicking OK to close the dialog box.
Now, when you save the file and preview it in a browser, you'll need to click the controller bar's Play button to start the song.
So,
how do you learn all the parameters for the various media objects? Look
them up on the Web. I happen to know from experience what many of them
are, but I certainly didn't when I first started, and I'm sure there
are almost as many that I don't know.
Some
manufacturers, like Apple, have a whole page in their site's QuickTime
section devoted to the various parameters. Windows Media isn't as user
friendly. At least, when I went looking for similar documentation on
Microsoft's Web site, I couldn't find anything.
There
are, of course, hundreds of other sites out there that cover this
information. Just like nature, the Web abhors a vacuum. Interested Web
developers always fill the gaps in software company's documentation. As
a courtesy, I've included a number of good sites in the Supplemental
Material section, so look there after you finish the lesson.
Earlier,
I mentioned the fact that players and the software that creates content
for those players gets updated all the time. This means that even if a
user has the plug-in for your particular media object, it doesn't mean
that plug-in is the right one for the file you embedded.
Let
me give you a scenario: You've just inserted a file that was optimized
for the most recent version of a player, and it has some new, funky
features. But, that new version is only two months old. There's a high
probability that many folks don't have the new plug-in yet. What do you
do? Simple. Always include a link to the required plug-in!
How do we do that? Take a look at the Property Inspector. Right under the Src (source) field for my media object is a field labeled Plg URL. That's short for Plugin URL. In other words, the URL where the user can find the plug-in (see below).
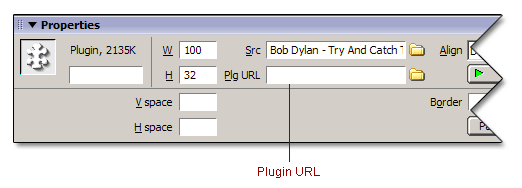
Plg URL field
All
you need to do is enter the URL where the most recent version of the
player can be downloaded. So, if the user doesn't have the required
plugin, they'll see a link to the player instead and a warning that
they need to update their player in order to see or hear the media
object.
Next,
I want to discuss a very specific form of media object—Flash Video. If
you look back up at the figure that began the embedding media objects
discussion, you'll see the button for it on the Insert bar.
Let's move on to Chapter 4 and learn more.
Flash
Video is Adobe's proprietary file format (.flv) used to deliver video
on the Web. Flash Video has many noteworthy adopters, including
YouTube, Google Video, Reuters.com, Yahoo! Video, MySpace, and BBC.com.
As you'd suspect, it requires the user to have the Adobe Flash Player
installed on their system. It can, however, also be viewed by a number
of third-party players. These, for example:
- MPlayer
- VLC media player
- Any of the following players that use DirectShow filters, so long as the ffdshow filter has been installed:
- Media Player Classic
- Windows Media Player
- Windows Media Center
Flash
Video is also quite backward compatible, going all the way back to
version 6 of the Flash Player. As I mentioned previously, the Flash
Player has the largest installed base of any other player out there,
which explains why so many major Web sites have jumped on the Flash
Video bandwagon.
Sadly,
we don't have the time or space to go into actually creating Flash
Video. Suffice to say, it's done by importing video files into Adobe
Flash Pro and exporting the finished product as Flash Video.
One
of the nice options Flash Pro supplies for creating Flash Video is the
ability to configure the file for progressive download. This allows you
to stream the video (meaning the user doesn't have to download the
entire video before it starts playing) using HTTP streaming. The video
stream is sent across the same protocol as the Web page, as opposed to
needing to set up a special (and expensive) streaming server. It's not
quite as powerful as full-blown streaming server technology, but it's
not too shabby.
The
end result is a two-file setup: the .swf file you embed in the page,
which contains the player interface, and the .flv file, which sits on
your server and contains the video. The .flv file is progressively
downloaded by the .swf file for the user. Think of it like filling your
bathtub. Instead of waiting for the Water Authority to show up with 20
gallons of hot water, you just turn on the tap, and the tub begins
filling.
Embedding
Flash Video is no different than any other embedding process. To see
just how simple it is, let's replace the Horace Vallas embedded WMV
file with the Flash Video version I included in the Zip. Just follow
these steps:
- In vallas.html, select the embedded WMV file, and press your DELETE key to remove it from the page.
- With your cursor still in the page, click the Insert Flash Video button:
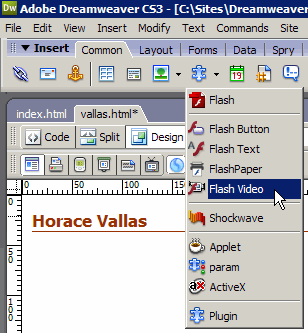
Insert Flash Video
- In the resulting dialog box (shown here), click the Browse button next to the URL field to select your .flv file.
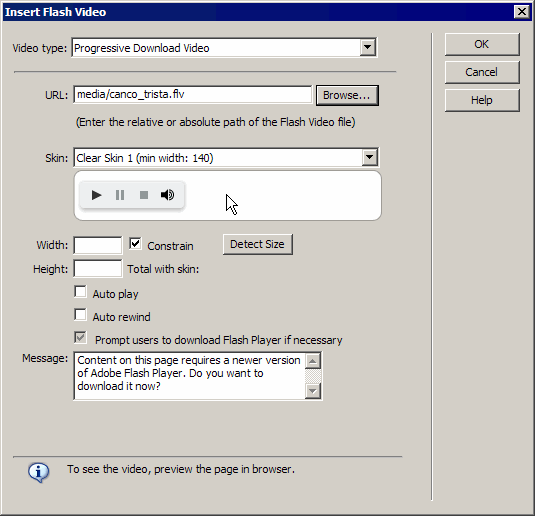
Insert Flash Video dialog box
- Use
the Skin drop-down menu to select a controller bar style. This is the
.swf file I mentioned earlier. I'm sticking with Clear Skin 1 here:
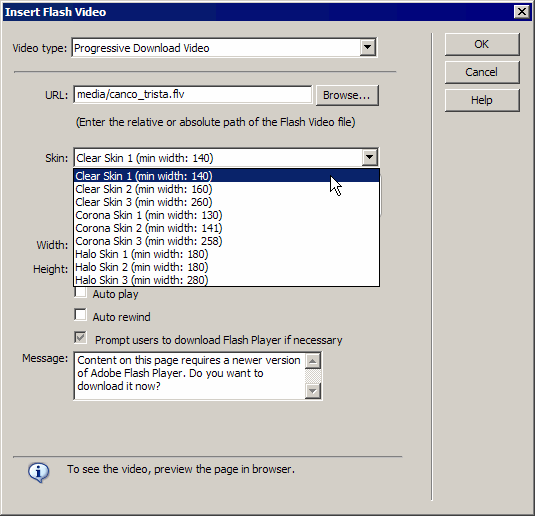
Select your skin
- If you don't readily remember the dimensions of the video, click the Detect Size button:
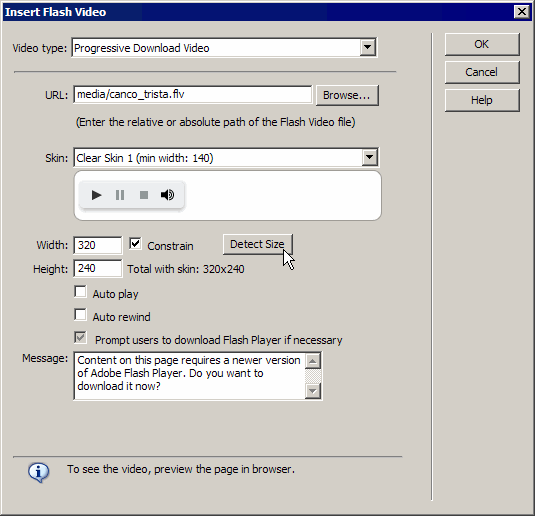
Detect Size
- You can then enable or disable Auto Play and Auto Rewind as you see fit. Notice that the Prompt user to download Flash Player if necessary option is selected by default. I suggest leaving it that way for reasons previously mentioned.
- Click OK to close the dialog box.
- At
this point, you may see a dialog box for copying dependent files, shown
here. These are JavaScript files that deal with a bug in Internet
Explorer.
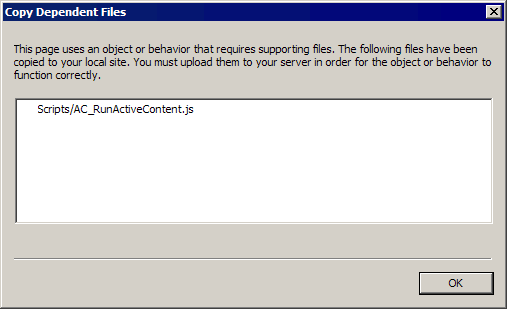
Copy dependent files
- Click OK. The files are copied to your local root folder, and you are returned to the Document window, shown next:
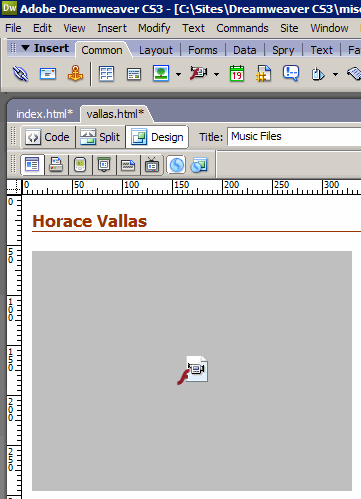
Flash Video in the Document window
The
Property Inspector doesn't give you a whole lot of formatting options
on this one. You can access Auto Play and Auto Rewind, reset the player
dimensions, and change the skin style. Understand that every time you
change skins, a new .swf file is saved into your local files. You have
to remember which one you're using come upload time, and make sure that
both it (the .swf file) and the .flv file get uploaded to the server.
You can then clear out any of the skins .swf files you don't use.
My finished results look like this:
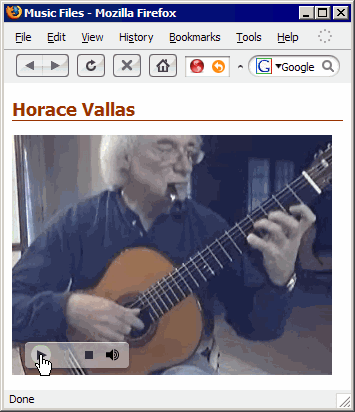
Previewed in a browser
Are
you starting to feel like you might be an audio-visual mastermind with
just a little more practice? Good! You should. As you can see, placing
media content into our pages isn't all that difficult.
The
difficulties don't appear until you start testing pages. You're going
to find that, even in this day and age, audio and video are not
seamless. For my money, Flash Video is the best game in town.
Otherwise, I simply link to MPEG video files.
I've
also found over the years that plug-ins and players go wonky on a
regular basis. For example, I personally cannot get QuickTime to play
nice in one of my machines. It just doesn't function, and I can't
figure out why. Fortunately, I have a number of machines in the house
to test on, so I know it's that one machine.
If you run into any technical troubles in this lesson, just holler in the Discussion Area, and I'll do my best to help.
Remember,
in the last lesson, we turned on accessibility features for media
objects. Notice that the Accessibility dialog box didn't crop up
anywhere in this lesson? Seven times out of 10, these features only pop
up when you're trying to incorporate interface elements created with
media objects (Flash Text or Flash buttons, or native Flash), where
assistive technology couldn't render the media object for the user
unless you supplied access keys.
However,
depending on the type of media object you try to embed in a page, you
may see an Accessibility dialog box pop up. As I said in the last
lesson, if you want (or are required) to make your site accessible,
then don't use media objects as interface elements.
Lets roll on over to Chapter 5 and wrap this lesson up
Today's
lesson focused on audio and video media objects. We learned that
browsers need helper applications (players) in order to present audio
and video files, and the browsers access these helper applications by
way of plug-ins and ActiveX controls. We saw that inserting media
objects was a fairly simple operation—clicking the Insert Plugin
button, choosing our media file, and setting any necessary parameters
was all there was to it. We also discussed how to make finding the
right plug-ins easier for our users by including plug-in URLs in our
pages.
We
finished the lesson with a discussion of Flash Video. We learned that
it's getting a great deal of use because so many users have the Flash
Player installed by virtue of so many browsers including it
automatically. We took a look at some of its nicer features, like HTTP
streaming, and saw how simple it is to place Flash Video in a page and
set up player skins.
Coming
up in Lesson 9, we'll examine JavaScript-based behaviors. These
Dreamweaver behaviors give you access to more than 20 other possible
effects. We'll examine the interface for working with behaviors and
discover how to implement some of the more useful ones.
QuickTime Parameters
http://www.apple.com/quicktime/tutorials/embed.html
|
|
Here, you'll find parameter listings for the QuickTime Media Player.
|
Windows Media Player Parameters
http://www.w3schools.com/media/media_playerref.asp
|
On this site, you'll see the parameters listings for Windows Media Player.
|
RealMedia Parameters
http://service.real.com/help/library/guides/extend/htmfiles/appc_par.htm
|
|
And here are the parameter listings for RealMedia object files.
|
Q: You talked a lot about media objects and Flash Video, but you didn't discuss Native Flash, Flash Text, or Flash buttons. Why?
A:
Those topics were covered in my introductory course, so I didn't
include them again here. Of course, you may not have taken that course
and would like some more info about these Flash objects. No problem.
Ask me in the Discussion Area, and I can give you a quick refresher.
This assignment is pretty simple. I just want you to make a new file and
insert the small Flash Video file into it. We'll incorporate this new
page into the site's sidebar in a later assignment.
Right-click or CONTROL-click this link to download the L08_assignment.zip folder to your desktop. From there, open the Zip file, and extract the leader.flv file into the images folder within your site's local root folder.
- In your Files panel, create a new blank file and name it instructor.html.
- Enter a document title for this file in the Title field, "Our Fearless Leader?"
- Create
an embedded style sheet within this file that includes styles for the
<body> and <h1> tags, assigning them the following
properties:
The <body> tag:
background color: #31363E
The <h1> tag:
font-family: "Courier New", Courier, monospace
font-size: 110%
font-weight: bold
color: #FFFFFF
border-bottom-width: 1px
border-bottom-style: solid
border-bottom-color: #FFFFFF
- After you've completed the style sheet, place your cursor in the Document window, and then, enter the following text:
Our Fearless Leader.?
- Format this text as a Heading 1.
- Leave the cursor on the same line as the heading, and then, click the Insert Flash Video button.
- In the resulting dialog box, select the leader.flv file, and select the skin of your choice.
- Make sure to fill out the rest of the dialog box as discussed in the lesson, and then, click OK. The Flash Video object, because it is a block-level element, will be inserted below the heading.
- Save the file, and preview it in your browser.
 Note
Note 


