|
<html>
<body>
<h2>This is the first PHP coding section</h2>
<?php
echo "This is <i>PHP code</i>\n";
?>
<h2>This is the second PHP coding section</h2>
<?php
echo "This is <b>more</b> PHP code\n";
?>
</body>
</html>Lesson 02 - Basic PHP Programming
Chapter 1:
Introduction
Welcome back! I hope you've been able to get your WAMP64 server up and running and that you're ready to start creating PHP Web pages. In today's lesson, we'll start doing some simple PHP coding. To get your feet wet, we'll look at the basics of how you incorporate PHP code into standard HTML Web pages. We'll also cover how PHP handles simple programming features such as variables, logic control, and output.
After that, we'll delve into one of the neatest features of PHP—using include files. The Recipe Center application we'll build relies on PHP include files to standardize the look and feel of the Web site. It's crucial that you get a handle on how this piece of the application works before we start building it.
Okay, now that you know where we're going, let's get started.
Chapter 2:
PHP Basics
Before you can incorporate PHP into a Web page, you need to understand how a Web server handles PHP code. We'll cover that in this chapter as we walk through the steps involved in writing your own PHP programs.
Identifying PHP Code Blocks
If you're familiar with HTML coding, no doubt you know about HTML tags. All HTML pages use tags to identify sections within the Web page. Each HTML section uses an opening tag and a closing tag. For example, to form a basic Web page, you would use the code:
<html>
<body>
  <h1>This is a simple Web page.</h1>
  This is the text portion.
</body>
</html>
The <html> and </html> tag combination marks the start and end of the Web page. The <body> and </body> tag combination marks the start and end of the body of the Web page. Text that requires special formatting is also enclosed in tags. The <h1> and </h1> tag combination marks the text as using the Header 1 HTML font style.
PHP code is no different. You can embed code blocks anywhere within the standard HTML code page, but they must be identified by start and end tags. There are a few different ways you can do this. The most basic method is to use the <?php and ?> tag combination:
<html>
<body>
   <?php
     php scripting code
   ?>
</body>
</html>
The PHP tags are contained within the normal HTML Web page. You can also have other HTML tags outside of the PHP code area, such as header tags and paragraph tags. Notice that the PHP begin tag (<?php) is open-ended. The Web server interprets everything between the begin and the end tag—in other words, everything you put between the <?php and the ?>—as PHP code. You can't use normal HTML tags within this area, only PHP code.
If you're incorporating PHP code in a Microsoft FrontPage or Adobe Dreamweaver application, you must use a different tag format. You have to specifically identify the PHP section as scripting code so FrontPage or Dreamwaver recognizes it as code. In both of these cases, you must use the format:
<html>
<body>
   <script language="php">
     php scripting code
   </script>
</body>
</html>
This method allows FrontPage and Dreamweaver to recognize the code blocks and leave them alone when formatting the rest of the Web page.
You aren't limited to having just one PHP coding block in your HTML code. You can have as many PHP coding sections as are necessary. For example, your code could look like this:
<html>
<body>
 <h2>This is the first PHP coding section</h2>
   <?php
     echo "This is <i>PHP code</i>\n";
   ?>
 <h2>This is the second PHP coding section</h2>
   <?php
     echo "This is <b>more</b> PHP code\n";
   ?>
</body>
</html>
Each PHP code section has its own beginning and end tag combination. Anything outside of the PHP tags is considered normal HTML code and is treated as such by the Web server. This example also demonstrates how PHP displays information in the final HTML page.
For a Web page to be dynamic, the PHP code must create HTML code for the client to interpret. The example above uses the PHP echo command to send text to the client Web browser. The Web browser interprets the text just as if it was part of the normal HTML code page.
Let's do an exercise to see how this works. Follow these steps to create a new Web page:
|
<html>
<body>
 <h2>This is the first PHP coding section</h2>
   <?php
    echo "This is <i>PHP code</i>\n";
   ?>
 <h2>This is the second PHP coding section</h2>
   <?php
    echo "This is <b>more</b> PHP code\n";
   ?>
</body>
</html>Any Web page file that contains PHP code must use a .php file extension. This notifies the Web server that it must run the Web page through the PHP processor to execute the embedded code. If you use the standard .htm or .html file extension, the Web server won't process your PHP code, and your clients will see just the raw PHP code on their screens (ouch).
When you view the Web page from a browser, you should see this:
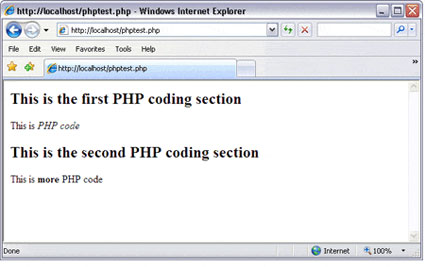
Displaying the sample PHP code in a browser
That's exactly what we expected to see. If instead you see your PHP programming code, make sure you have the PHP beginning and end tags and that you saved your file with a .php file extension.
Now let's view the HTML code from a browser to see the exact code that the server sent. In Microsoft Internet Explorer, you can do this by clicking View > Source. Notice that the HTML code shown doesn't include the embedded PHP code, just the HTML code that the PHP echo commands generated.
Viewing the HTML source code using Internet Explorer
This demonstrates exactly how PHP works. The only thing the Web browser sees within the PHP coding sections is any output from the PHP script, nothing else. The Web server hides all of the PHP code from the client. Now that you've seen how to run PHP code, it's time to go through a few of the basics of PHP programming.
PHP Variables
Just like any other programming language, PHP allows you to use variables within your scripts. Variables are placeholders that you assign values to throughout the duration of the program. When the program references the variable, it represents the actual value that the program last assigned.
Variables are what make PHP an excellent choice for dynamic Web pages. You can create Web pages using variables whose values change based on data stored in a database. Each time the Web server references a variable, the variable can contain a value from a different record in the database.
A PHP variable is identified by a leading dollar sign ($) in front of a text variable name. You must start a variable name with a letter or an underscore character (_), and it can only contain letters, numbers, and underscores (a variable name can't contain spaces).
You set values to variables using assignment statements, like this:
$test = "This is a test string";Notice that the PHP assignment statement (like the echo statement we saw earlier) ends with a semicolon. This is how PHP recognizes the end of a statement, so you might as well get used to it as soon as possible. I can't tell you how many PHP coding errors I've created by forgetting semicolons!
Variables can contain either string values (common text characters such as letters, numbers, and special characters) or numerical values. A single variable can hold either type at any time (in this way, PHP is unlike some programming languages that force you to declare a variable's type at the start of the program). Of course, this can get confusing, so I strongly recommend sticking with one data type per variable name to help make your life a little easier.
Here's a simple example demonstrating using different data types in a variable in PHP:
<html>
<body>
  <?php
    $name = "Rich";
      echo "<h2>Hello, $name, how are you?</h2>\n";
    $name = "Joe Bob";
      echo "<h2>Oh, so now your name is    $name, huh?</h2>\n";
    $name = 4.2;
    $name = $name * 2;
      echo "<h2>That's tricky, now the variable is equal to $name!</h2>\n";
  ?>
</body>
</html>
Notice that you can separate the PHP code block from the HTML code by using blank spaces. Doing this often makes it easier to find your code blocks, especially when you're working with large, complicated Web pages.
Let's look at exactly what's going on here. First, the program assigns a string value of "Rich" to the variable $name:
$name = "Rich";Notice that you must enclose the string in double quotes when you assign it. These mark the beginning and end of the assigned string value.
The next statement uses the variable value by echoing an HTML-encoded text string that includes the variable:
echo "<h2>Hello, $name, how are you?</h2>\n";Unlike other programming languages, PHP allows you to just insert the variable within the echo statement. The \n characters at the end of the echo statement are code to indicate a standard newline character. The newline character forces the cursor to start a new line on the display. While not absolutely necessary, this helps separate the output line within the HTML code.
Next, the program changes the variable to a different string value, which includes a space:
$name = "Joe Bob";When the program uses the variable in the echo statement, the client browser will display the entire variable string value exactly as it's stored, including the space (instead of removing the space as it does when displaying HTML code).
Finally, the program assigns a numerical value to the variable, and then it uses an arithmetic statement to calculate a new value for the variable:
$name = 4.2;

$name = $name * 2;
You can use variables in just about any type of arithmetic statement that uses standard arithmetic operators. Here, the result of the operation is stored in the $name variable, and then the program uses an echo statement to display the variable's new value.
Let's view this code in action. Copy the entire code sample above, and paste it into a file called test2.php (located in your WAMP64 www folder). Then view it using your browser pointed to the URL http://localhost/test2.php. You should see the output as shown here.
Web page generated from using variables
After displaying the test2 Web page in your browser, view the source code by clicking View > Source (if you're using Internet Explorer). Again, notice that the PHP code doesn't show up in the HTML source code, just the text that the PHP code echo statements produced.
When you're done looking at the test2 page, follow me to Chapter 3, where we'll get into some more-advanced elements of PHP.
Chapter 3:
More PHP Coding
Okay, so now you know how to insert PHP code into HTML and how to assign values to variables in PHP. You're off to a great start! It's time to move on to some more-complicated programming topics. Two more programming features of PHP that you'll need to become familiar with are logic control and arrays.
Logic Control
Logic control is the generic term programmers use for programming statements that alter the execution path of a program. What's an execution path? It's the order in which statements get executed.
You see, the PHP interpreter on the Web server executes each PHP statement in the order it appears in the script. Sometimes, though, you want certain statements executed only under certain conditions or executed multiple times. There are several different types of PHP logic control statements you can use to alter program execution order. The ones we'll use in our course application are if-then statements and while loops.
Let's take a look at both of these types of logic control statements separately.
If-then Statements
A standard if-then statement executes one or more statements based on evaluating a condition. If the condition is true, the statements are executed. This feature allows you to execute PHP code based on the results of a comparison, such as adding tax to a price only if the item is a luxury item. Here's an example of how this works:
if ($value > 50)
  {
    statements to execute
  }
This is the basic format of a PHP if-then statement. The if-then statement contains the statements it controls within braces and the condition it evaluates within parentheses. The condition must be an expression that results in either a true or false answer. In this example, we're checking to see if the value contained in the $value variable is larger than 50. If it is, the controlled statements are executed.
You can check for all sorts of conditions, such as whether a number is a specific value or range of values, or whether a string value is equal to specific text (for example, checking for database records that are marked as active).
You can string if-then statements together using the elseif statement:
  if ($value > 50)
    {
      first set of statements
    } elseif ($value > 25)
    {
      second set of statements
    } else
    {
      third set of statements
    }
This code will perform one of the three sets of statements:
Here's an example we'll try out in a moment:
<html>
<body>
  <h1>Random number test</h1>
      <?php
        $value = rand(0, 100);
        if ($value > 50)
    {
        echo "<h2>The value is big:   $value</h2>\n";
    } elseif ($value  > 25)
    {
        echo "<h2>The value is medium:     $value</h2>\n";
    } else
    {
      echo "<h2>The value is small:     $value</h2>\n";
    }
      ?>
</body>
</html>
This script uses the rand() function to generate a random integer value between 0 and 100, which it stores in the variable $value. The script then uses that variable in three separate if-then statements.
Copy the code above into a file called randomtest.php, and run it from your browser (http://localhost/randomtest.php). You can run the PHP script multiple times by clicking the reload button on your browser. Each time you reload the Web page, the script generates a new random number, producing a different answer.
While Loops
While loops allow you to process a set of statements repeatedly until a specific condition is met:
while ( condition)
{
     statements to repeat
}
Usually, within the repeated statements is a statement that alters the value of the variable in the condition. Here's a simple example of how this works:
$count = 0;
while ($count <> 10)
{
    echo "the value is $count";
    $count = $count + 1;
}
The while loop will continue executing the two statements until the $count variable is equal to 10. The Recipe Center we'll build will use while loops to return just the right recipes based on a user's search criterion.
Arrays
Arrays allow you to group similar values together in a list using a single variable name. You can then either handle the values as a whole by referencing the variable name, or handle each value individually within the array by referencing its place in the array list. When you access data from a MySQL/MariaDB database, you'll need to use arrays. So it helps to get a handle on them early.
PHP groups database results into arrays based on the individual data records. Our Recipe Center application will store each recipe as a single database record, with the individual data elements (recipe title, who posted it, the ingredients, and the recipe directions) contained within the record. When you query the database, PHP will push the returned data into an array. You'll then have to extract the individual data elements (such as the recipe title or ingredients) from the array so you can display them in the proper location on the Web page.
You define an array variable in a normal assign statement. The difference is that you create a list of values instead of a just a single value:
$valarray = array("Rich", "Barbara", "Katie", "Jessica");
This assign statement creates an array of string values. Notice that the assignment statement uses the PHP array() function, which creates the array using the data values you specify. You must list each element in the array, and separate them with a comma. While this example uses string values for the elements within the array, you can also use numbers.
PHP references each element in an array using a positional number. The first element in the array is element 0, the second is element 1, and so on. So, for example, in the assign statement above, Rich=0, Barbara=1, Katie=2, and Jessica=3. (It takes a little practice to remember that you always start counting array elements with the number 0.)
To reference a single element in an array, you add the desired element number enclosed in square brackets to the variable name:
<html>
<body>
  <?php
   $valarray = array("Rich", "Barbara", "Katie", "Jessica");
   echo "The first person is $valarray[0]";
   echo "The last person is $valarray[3]";
  ?>
</body>
</html>
By default, PHP references array elements by their positional value. PHP also supports associative arrays, which associate an array value with a key. The key can be either a number or a string value. Take a look at this example:
$valarray = array("fruit" => "banana", "vegetable" => "carrot");
The array definition assigns a key value of fruit to the data value of banana, and a key value of vegetable to the data value of carrot. Now, if you reference the array with one of the key values, PHP automatically retrieves the data value. This code statement:
echo "My favorite fruit is a {$valarray ['fruit'] } ";
Will produce the output My favorite fruit is a banana. Notice that when you use an associative array variable in the echo statement, you must enclose it with braces. This is different from numerical arrays, which don't need the braces.
Later in this course, you'll see that you have to use this technique to extract individual data elements from an array produced by a MySQL/MariaDB database query.
Sometimes starting to learn about loops and variables can make your head spin, and I don't want you to get too dizzy.
So let's move on to Chapter 4 and discuss an entirely different and very cool things you can do with PHP.
Chapter 4:
The PHP include() Statement
One feature of PHP that many Web developers love is the ability to create include files. You might hear these referred to as Server Side Includes. The include() statement allows you to include the contents of one Web page within another Web page simply by referencing a file name. This is a lot like using a frame or an iframe in HTML, but it's easier, and you can be surer that Web browsers will display everything the way you want.
The PHP processor inserts all of the lines in the included file directly into the PHP code exactly where you place the include() statement. It's just as if you typed all of those lines of code yourself into the page that's displaying it!
The server then processes the included lines as normal PHP code. Any variables within the included file are handled as if they were defined within the main script.
Developers use this feature to create standard header and footer include files, which they can then easily incorporate into all of their Web pages. Imagine having a standard header and footer section on all of your Web pages by just adding two lines of code!
You could create the navigation for your site once and then be guaranteed that it will display exactly the same way on every page. If you ever needed to change something in your navigation, you'd only have to alter your code one time, in one place. What could be better?
The format of the include() statement is simple:
include("file name");You just replace file name with the actual name of the file. That's all there is to it. Let's try it out:
<?php
echo "<h1 align=\"center\">This is a test header</h1>\n";
echo "<a href=http://localhost/main.php>Main</a>\n";
?>
Developers often give include files the .inc extension to indicate that they are not complete Web pages on their own. You can also attach the .php file extension to indicate that the file contains PHP code. But it's not necessary to do this since the server doesn't process the actual include file itself, but rather just inserts it into the main PHP file. So, really, you could give the file you're going to include an .inc extension, a .php extension, or even an .html extension.
This little example also demonstrates another PHP tidbit to remember. Notice that you must escape the double quotes in the h1 tag using the backslash character. This is to prevent the echo statement from thinking that the quotes represent the end of the string.
<html>
<body>
<?php include("header.inc.php"); ?>
<br><br>
<h2>This is the body of the main page</h2>
</body>
</html>You should see the header file information, followed by the main file information, like this:
Adding a header to a Web page
If you view the source code in your browser, it will appear as a single HTML file. The Web server inserted all of the statements in the included file into the HTML code of the main Web page. Your visitors will have no idea you cheated when making the Web page!
Referencing include() Files
The simple example shown above referenced the included file only by its file name. There was no path information provided. You can get away with this as long as the included file is located in the same directory as the main file.
But some Web programmers prefer to keep included files separate from the main files by placing them in a folder under the document root directory. To reference these include files, you must use a path name along with the file name. However, this can be a tricky business that leads to interesting results.
Here's a simple demonstration of what you need to watch out for when including a file using a path name:
<html>
<body>
<?php include("c:\wamp\www\myincludes\test.inc.php"); ?>
<h2>This is the body of the main page</h2>
</body>
</html>
So far, everything looks just fine. The include() statement uses a full path name to find the included PHP file, which is now located under a subdirectory of the document root directory. But try viewing this in your Web browser. You should get something like this:
Using an invalid path name to reference an included file
So what happened, why the error messages? The answer is in the way PHP interprets strings. If you remember from the example at the start of this chapter, we had to use a backslash character to escape out a double quote character. PHP interprets the backslash character as a special character, which gives the next character a special meaning.
Unfortunately, on Windows workstations and servers, path names are referenced using backslashes. This caused the unfortunate coincidence of the \test.inc.php file starting with a \t character, which to PHP represents a special character—a tab.
As you can see in the error message, sure enough, the path name PHP interpreted included a tab instead of the '\t' characters. There are two ways to remedy this situation:
PHP recognizes the Unix-style forward slash in path names just fine, even when running on a Windows system. If this gets too confusing for you, simply use double backslashes everywhere in the path name. This causes PHP to interpret the character as a normal single backslash. Try changing the line in the main.php file to:
include("c:\\wamp\\www\\myincludes\\test.inc.php");Now test the page, and you'll see that it works fine.
The require() Statement
The last example demonstrated another limitation of the include() statement. When it failed, it produced an error on the Web page, but the PHP program just kept on going. Notice in the resulting Web page that the next HTML line displayed perfectly fine after the error messages.
Sometimes you don't want to continue if an error occurs in your Web page. Instead of just plowing through the rest of the code, you want the server to stop immediately so the error message is the only thing you see. PHP has a solution for this.
The require() statement works exactly like the include() statement except for one difference—it forces the Web server to stop all processing if it fails.
Let's change the main.php test program to use a require() statement instead of an include() statement (use the bad form of the path name that you now know will fail). The line you need to alter is in bolded red below:
<html>

<body>

<?php require("c:\wamp\www\myincludes\test.inc.php"); ?>

<h2>This is the body of the main page</h2>

</body>

</html>
Now view the file using your browser and see what happens. The resulting Web page should look like this:
The result of using the require() statement
Do you see anything different from when we used the include() statement? The error messages are there, but the Web server didn't process the HTML code from the rest of the main.php file. Once the Web server hit the error message, it stopped processing the rest of the HTML code in the file. This can come in handy for larger Web pages where it may be hard to spot error messages mixed in with all the other HTML code.
Pretty good stuff, huh? In upcoming lessons, you'll get to actually start applying what you've just learned and see how great it really is.
Chapter 5:
Summary
Today we covered how to incorporate PHP code in Web pages. We first looked at how to embed PHP code sections within standard HTML pages using the <?php ?> tag combination. Anything within those PHP code tags is sent to the PHP interpreter on the Web server. The Web server incorporates the output from the PHP code into the rest of the HTML code it sends to the client's browser.
Next, we explored a few features of the PHP programming language. PHP allows you to use variables to store data values within the program. PHP variables start with a dollar sign and can include numbers, letters, and the underscore character (but the name can't start with a number). Variables can change data types at any time within the program, but it's not recommended to do that.
After exploring variables, we dove into standard programming logic control in PHP. If-then statements and while loops allow you to alter the execution path of the program by testing conditions defined in the statement. If-then statements can be linked together using the else clause to test for multiple conditions. The while loop repeats itself until the defined condition is met.
Arrays are another feature of PHP programming that you'll need to understand when using databases. A variable array can contain multiple values using the same variable name. Individual data elements within the array are accessed using an index number, starting with zero for the first element.
Finally, we met the include() and require() statements. These statements allow you to include code from one PHP file within another PHP file. This enables you to create a single header, footer, or navigation bar that will appear on numerous Web pages.
In our next lesson, we'll look at the other important element in a content management system—the database. The AMP system uses the MySQL database to store content that the PHP program accesses to dynamically alter the Web page. We'll see how to store data within a MySQL database and how to create a user account that our Web pages will use to access the data.
Until then, don't forget that you have an assignment and a quiz for this lesson. Good luck and I'll talk to you soon!
Supplementary Material
|
PHP Manual http://www.php.net/manual/en/ |
| This is the official PHP programming language manual. This is a great place to check whenever you have questions about using PHP. |
FAQs
Q: Are PHP variable names case sensitive?
A: Yes, the PHP programming language recognizes uppercase and lowercase in variables. Thus, the variable $Test is different from the variable $test.
Q: Is there a limit to how long a variable name can be?
A: No, PHP allows variable names of any length, although for practical reasons you probably don't want to find out if this works or not. It's good practice to use meaningful variable names in your programs.
Assignment
Now that you have the basics of PHP programming under you belt, let's work
on writing some programs. First, write a program that uses echo
statements to display some simple text on a Web page. Add some HTML
tags inside the text (such as bold and italics) and see if it affects
the Web page text.
Next, let's try writing a program that
displays a list of names on a Web page. To do that, first load the
names into an array variable like we did in the lesson. Then, use a
counter and a while() loop to loop through the array of names and
display them using an echo statement.
Remember, arrays start at
index 0, so if you have four names in your array, you'll want to start
your counter at 0, and stop after it gets to 3 (hint: $counter < 4).
Finally, if you'd like to try some mathematical programming, let's
write a program that calculates the factorial of a number.
The
factorial of a number is defined as the product of all integers up to
and including the number. For example, the factorial of 5 is 1 x 2 x 3
x 4 x 5 = 120.
Use one variable to hold the number of which you
want to find the factorial. You can use a while loop to loop through
the multiplications until you've reached the number. Use another
variable to hold the result during the loop. Finally, use an echo
statement to display the result on a Web page.
If you have
any problems with this assignment, come to the Lesson 2 Discussion
Area for help.
After giving this a try, stop by the discussion area,
I'll post my version of the code there.